Teriyaki Chicken Wings

TeriyakiChickenWings

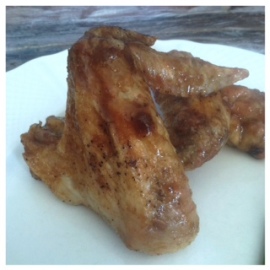
Added advantage of being on a paleo diet is that I can gorge on these delicious teriyaki chicken wings. Unlike diets with heavy carbohydrates, the paleo diet is heavy in protein and fats allowing me to enjoy in the skin and all. These wings deliver on all notes. The sauce combines sweet and salty tangs with a meaty juiciness.

Teriyaki is a cooking technique used in Japanese cuisine in which foods are broiled or grilled with a glaze of soy sauce, mirin and sugar. The word teriyaki derives from the noun teri–the shine or luster given by the sugar content in the tare–and yaki–the cooking method of grilling or broiling. Traditionally, the meat is dipped in or brushed with sauce several times during cooking. In North America, any dish made with a teriyaki-like sauce or with added ingredients such as sesame or garlic (uncommon in traditional Japanese cuisine), is described as teriyaki. Pineapple juice is usually used as it not only provides sweetness but also bromelain enzymes that help tenderize the meat.

Here are some tips to keep in mind:

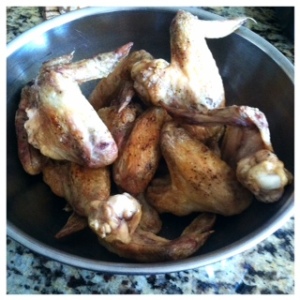
  1. I used chicken wings. They combine both the drumettes and wings into one; however, using just wings or just drumettes is optional.
  2. I used coconut aminos for a paleo version. Using soy sauce will provide the same flavor, but it is not gluten free.
  3. I used honey for my sweetener. I think it is not overly sweet and works well as a thickening agent for a sauce.
  4. TeriyakiChickenWings2Careful using fresh ginger because it will cause chunks in the sauce that can be potent.
  5. Broiling works well in browning the outside skin without overcooking the meat inside.
  6. Cooking the wings skin side down for the first ten minutes, allows the meat to cook through without burning the skin.
  7. The sauce is easy! Mix all the ingredients until the desired thickness.
  8. The sauce will continue to thicken and cook after being removed from the heat, so I suggest not boiling it over seven minutes.
  9. Toss the wings evenly to coat the
    wings evenly.

Napkins will be your best friends with this meal. It is finger licking good, but on the sticky side. I could have continued to eat the entire batch myself. Keep that in mind and be sure to double or triple the meal, inviting friends and family to come and enjoy the dish. It is a quick and easy meal for reunions and parties. Have everyone over to enjoy some wings and wow them with the sweet and salty crunch of these meaty wings.

Leave a comment with your favorite wing sauce. Follow my Pinterest. Check back again next Wednesday for more tips and tricks from The Cooking Bug.

Garam Masala Hummus

garammasalahummus

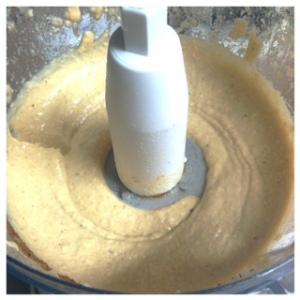
Hummus is a great side dip for parties and gatherings; however, store bought hummus can be expensive for the amount you receive. Eating out at Indian restaurants can be expensive as well. Solution? Homemade Hummus–it’s inexpensive and extremely versatile. From garlic to roasted bell pepper, hummus can be appreciated by all taste buds. The garam masala hummus today brings a big bite of the Mediterranean home.

Garam Masala is a popular Indian spice consisting mostly of black and white peppercorn; cloves; black and white cumin seeds; cinnamon and black, brown and green cardamom pods. Some masala may be toasted before use to extract flavor and aroma. Garam refers to the intensity of spices, which one can sense from just a whiff. Surprisingly, there is no single garam masala. Recipes and ingredients differ according to region as well as a chef’s individual preferences. From turmeric to fennel seeds, variations can arise to accompany the dish’s flavor; consequently, most pre-made spice mixes in grocery stores contain the basic ingredients.

Here are some tips to keep in mind:

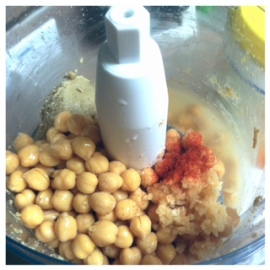
  1. I used homemade tahini, but you can use store bought. Most kinds of tahini are found in the healthy, ethnic or refrigerated sections of your supermarket.
  2. I used bottled lemon juice. If you use fresh, be sure to squeeze the lemon over a mesh colander to keep the seeds and strings from falling into your hummus.
  3. You may want to use more olive oil depending on the consistency of the hummus.
  4. Feel free to add more than a pinch of paprika to balance out the garam masala. I
    love paprika.
  5. Use about ¾ tsp of garam masala and add more to your tasting. It can be a potent spice if you are unfamiliar with the flavors.

garammasalahummus2Again, hummus makes the perfect party platter or side at lunch.  Pair hummus with chips and crackers or add to a wrap for an extra umph.  There are several variations of hummus to keep your stomach happy. Experiment to find your favorite recipes after trying the garam
masala hummus.

Leave a comment with your favorite hummus dip recipes. Follow my Pinterest for more recipes. Check back again next Wednesday for more tips and tricks from the Cooking Bug.

Tahini

tahini2

I never thought about the ingredients of tahini. It was not until I tried my hand at making hummus that I took a greater look into the ingredients. Surprise, surprise to find the main ingredients listed: sesame seeds, salt and oil–a lot simpler than I had realized. In a few short minutes, I created an ingredient to add flavor to my favorite Middle Eastern dishes.

Tahini is ground sesame seed paste, similar to peanut butter. It is a creamy, oily and smooth nut butter rich in calcium. Tahini is an important ingredient in Middle Eastern cuisine and recipes such as hummus, baba ghanoush, halva and vegan or goddess dressing. Plain, unprocessed sesame paste with no added ingredients, like the one mentioned here, is known as “raw” tahini. Like many nut butters, tahini is a great source of omega-3 fatty acids, calcium and protein. It supports higher levels of fiber than ordinary peanut butter and lower levels of sugar that compliment many nutritional diets.

Here are some tips to keep in mind:

  1. Use unsalted sunflower seeds. Unsalted seeds allow for you to add salt based on your taste buds.
  2. Roasting the seeds brings forth the nutty flavors that can be hidden.
  3. You can toast them in the oven or stovetop. They take no more than 10 minutes; keep your eyes peeled because they can burn easily.
  4. I used olive oil; blending with olive oil creates an adhesion of creaminess between
    the seeds.
  5. Making your own tahini keeps those pesky preservatives from surfacing into your diet.
  6. Because of tahini’s high oil content, I recommend refrigeration to prevent spoilage.

tahiniTahini possesses the ability to transform many ordinary dishes into extraordinary meals. It works for dressings; it works for dips; it works for flavor. The nutritional information of homemade tahini is leaps and bounds above store bought fakers. Who knew simple ingredients and a simple process could make such a flavorful additive to my Middle Eastern cuisines? I do, and now, you do too!

Leave a comment with your nutty, tahini recipes. Follow my Pinterest for more recipes. Check back again next Wednesday for more tips and tricks from The Cooking Bug.
Pesto and Halibut

pestoshrimpcaulipizza

As we all know, fish is a great source of omega-3 fatty acids.  But, fish can be, well, fishy with its bland flavor and slimy coating.  However, cooked properly and seasoned gracefully fish can be quite tasty and satisfying to your taste buds.  Halibut fits into these categories.

The pesto that I created was so delicious that it couldn’t be too nutritious.  Yet, when using fresh ingredients with no added preservatives and in moderation, anything can be healthy.  The pesto adds a nice flavor that tames the fishiness of the Halibut.  It can be used as a topping to any fish of your choice, tossed in with sautéed vegetables, added with spaghetti squash or with another dish of your imagination.

What you’ll need:

2 cups basil;   3 garlic cloves;   ½ cup walnut pieces;   ½ cup grated Pecorino-Romano cheese;   1 tsp lemon juice;   salt & pepper;   ¾ cup olive oil

Here are some helpful tips to keep in mind:

  1. I chopped my basil so that it would be easier to blend, but you can keep yours whole.
  2. You can use walnuts or pine nuts in a 1-to-1 ratio for your pesto.  I think walnuts give it a softer taste than pine nuts which are a bit more robust ground up.
  3. Add everything to the food processor except the olive oil.  Adding the olive oil separate allows for it to incorporate the ingredients evenly.pestoshrimpcaulipizza2
    4.  Add the olive oil slowly while the ingredients are blending.  Again, this process allows for an even incorporation of ingredients.
    5.  Blend for 30 seconds after adding the olive oil making sure to scrape the sides to create a more pastier pesto.
    6.  You can use Manchego or another type of cheese in replacement to the Parmesan.

If you are a pesto lover like myself, you’ll have no problem taking nibbles to make sure your seasoning is perfect before topping your food.  Remember, since pesto has so much olive oil that you will need to mix it before using it each time or the ingredients will separate.  Also, keep in mind that a little goes a long way so use the pesto sparingly.  Now, all that you have to do is top your fish or main dish with a tablespoon of pesto and enjoy.

Leave a comment with your pesto pairings.  Follow my Pinterest for more delicious recipes.  Check back again next Wednesday for more tips and tricks from The Cooking Bug.
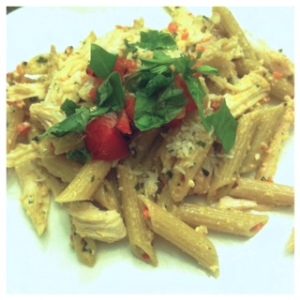
Roasted Red Pepper and Basil Pesto Penne

roastedredpepperpestopenne

The few times I enjoy pasta I love to use pesto. From ordinary pesto to out of the box recipes, there are variations for all foodies. Roasted red pepper and basil pesto can compliment a volume of dishes. Pasta can be so bland, but elevate it with pesto; chicken can be boring, but change normal with pesto. I enjoy the added note of half and half to create a creamy texture. It softens the dish and creates a tasty dinner for friends and family.

Here are some tips to keep in mind:

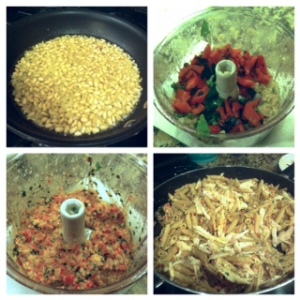
  1. Toasting your pine nuts accentuates their nutty flavor.roastedredpepperpestopenne2
  2. I used a fresh bell pepper. Char the pepper stovetop or broil it to produce a roasted, fresh flavor.
  3. Using fresh basil is the only way to make a pesto.
  4. Olive oil creates that creaminess ideal in pesto and facilitates cohesion among the ingredients.
  5. I used half and half, but you can use heavy cream or evaporated milk in exchange. The point is to add a creamy thickness to your sauce.
  6. I oven roasted a few chicken breasts in place of the rotisserie chicken. It is healthier because there is less butter, and you are using only white meat.
  7. Adding fresh basil on top of the finished dish enhances the brightness of the pesto.
  8. I topped the dish with sun-dried tomatoes; however, roasted or halved cherry tomatoes compliment the dish as well.
  9. I used a hand food processor leaving my pesto chunkier than normal.

I’m a huge fan of red bell peppers; I’m a huge fan of pesto; I’m a huge fan of splurging on pasta. This recipe delivers on all notes of flavor. With a few easy steps and ingredients, you can stretch your wallet without stretching your waistband. Enjoy a splurging pasta dish with the notes above and learn to love eating healthy.

Leave a comment with your favorite pesto recipes. Follow my Pinterest for more recipes. Check back again next Wednesday for more tips and tricks from The Cooking Bug.

Almond Butter

almondbutter2

Everyone has always strayed from fats because society has brainwashed us into thinking they are big, bad and scary.  The truth of the matter is that a balanced diet includes fat; one just needs to balance the amount they eat daily.  Nuts are a great source of protein and fat.  When I want to splurge, I choose to eat a peanut butter, or in this case nut butter, sandwich.

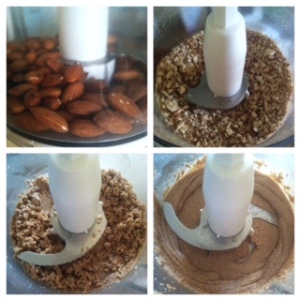
I’ve been dying to make my own nut butters previously, but I had this terrifying thought that it was too hard.  Boy was I completely wrong.  All you need is a food processor and the nuts of your choice.  While most nut butters are made from peanuts and almonds, you can make them with any type of nut.  The essential part of making the nut butters is grinding the nuts until they release their oils creating the creamy texture.  Take note that nut butters tend to have a grimy texture unlike processed peanut butters and may need to be mixed before eating it to reincorporate the oils.

Here are some tips to keep in mind:

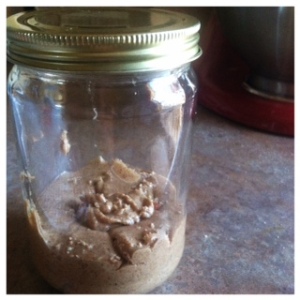
  1. I made half the amount of butter than the recipe; however, making more takes less time, funnily enough, because there is a higher volume of food being processed.  Ergo, you won’t have to stop 20 extra times to scrape the sides.almondbutter
  2. You can make as much or as little nut butter as you choose.  Be sure to keep it in an airtight container.
  3. Add any type of flavors to the nut butter: honey, white chocolate, dark chocolate, salt or chia.
  4. I suggest adding a pinch of salt to the butter or buying salted nuts from a whole grocers, like Sprouts.  Salt enhances flavors when cooking.
  5. Roast the nuts before processing them in a 350-degree oven for no more than ten minutes.
  6. Roasting the nuts brings out a nutty aroma, making your kitchen
    smell delicious.

Ta-Da! You’ve made your own, healthier and personalized, nut butter: simple and easy without those pesky preservatives.  Make as little or as much of the nut butter as you’d like for less than grocery store prices.  Individualize the butters with your favorite flavors to build new creations.

Leave a comment with your favorite nutty flavors.  Follow my Pinterest for more recipes.  Check back again next Wednesday for more tips and tricks from The Cooking Bug.

Teriyaki Salmon with Sriracha Cream Sauce

teriyakisalmonwsrirachacream2

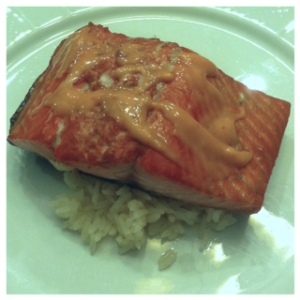
Sound fishy? We’ve divulged in fish Fridays every week. It can be challenging to mix up your fishy flavors. Teriyaki salmon with sriracha cream sauce elevates your fish in 30 minutes cooking time. Place atop rice and you have a wonderful dish that can compete with sushi restaurants worldwide. I love the complimentary sweet and spicy sparks that sizzles in my mouth with every bite. I don’t usually care for mayonnaise or spice, but this recipe changed my mind. Combined, they create a cooling sensation to the fire of sriracha.

Here are some tips to keep in mind:

  1. Allow the fish to marinade and collect flavors.
  2. In place of mayonnaise, you could use a greek yogurt. It is a healthier substitute that maintains a cooling sensation.
  3. Sriracha is a widely used hot sauce in many Asian dishes and can be found most commonly in ethnic food sections.
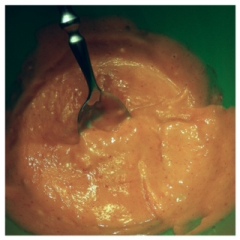
  4. The sweetened condensed milk is foul on its own; it is used to create the creamy thickness of a sauce.teriyakisalmonwsrirachacream
  5. I suggest using the sauce in small increments because it can clear your nostrils. I halved the recipe and still had leftovers.
  6. Add the sauce to a bottle and store in your fridge for later use and to create uniform plating.
  7. Keep eyes on your marinade because it can begin to burn easily on the stove.
  8. I suggest using Coho salmon because it contains the most nutritional benefits.
  9. When cooking your salmon, put a sheet of aluminum foil on the bottom of the pan. The excess sauce can cook into the pan and make it harder to clean.

Sweet, spicy and savory the dish hits all the high notes of a tasteful meal. High in omega-3 and full of flavorful notes, you’ll learn to love salmon as much as I do. It can be a versatile sauce for pork and other seafood. Experiment with the “spieety”–sweet and spicy–tastes of this meal.

Leave a comment with your favorite fish recipes. Follow my Pinterest for more recipes. Check back again next Wednesday for more tips and tricks from The Cooking Bug.

Pumpkin Pecan Butter

pumpkinpecanbutter

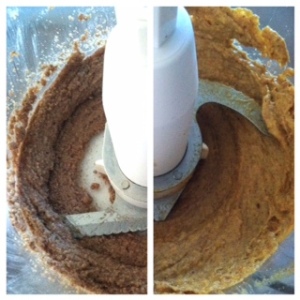
pumpkinpecanbutter2Beware: if you are on a diet or trying to stay slim, do not read any further!  I’ve recently found this pumpkin pecan butter.  It combines my two favorite categories: nut butters and pumpkin desserts.  With a few simple ingredients and 15 minutes, you have a delicious spread for breads, crackers or an empty spoon.
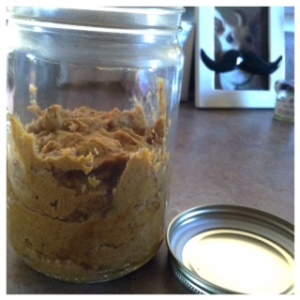
My favorite part of this recipe is the use of pecans.  Roasted pecans have a sweet almost caramelized flavor.  The concentration of heat draws out the deep nutty flavors of any nut.  Pecan butter is a healthier substitute to Nutella with more protein and healthy fat while still obtaining that sweet tooth flavor.

Here are some tips to keep in mind:

  1. Roasting the nuts are important because it draws out the oils within and enhances
    the flavor.pumpkinpecanbutter3
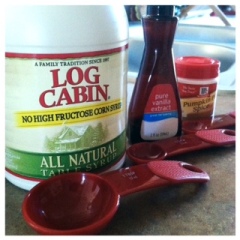
  2. I used pure maple syrup because it has a sweeter more natural taste.  I only used three tablespoons because the pecans already create a sweet treat.
  3. The vanilla balances the flavors and tones the sweetness down.
  4. I used my own pumpkin puree.  It lacks the preservatives and aftertaste of canned pumpkin.
  5. The pumpkin adds a second dimension of flavor and gives the butter a creamy, light and tan appearance.
  6. Be sure to scrape the sides of the processor down to incorporate all
    the ingredients.
  7. To ensure it lasts for a longer period, I suggest refrigerating the butter in an
    airtight container.

Toasted, delicious and a sweet addition to any snack.  You’ll want to be sure to have family or friends around who you can share with.  The pumpkin pecan butter is highly addictive.  Use it in sugar cookies for a pumpkin pecan butter stuffed cookie or a morning breakfast toast spread.  The possibilities are endless and delicious!  This butter is a perfect taste of fall and Thanksgiving.  It’ll make your house fragrant and wow your guests.

Leave a comment with your favorite pumpkin recipes.  Follow my Pinterest for more recipes.  Check back again next Wednesday for more tips and tricks from The Cooking Bug.