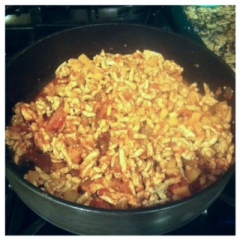
Peanut Butter Fudge

Now I know you all enjoyed the Nutella fudge that we had previously tried and I promised that I’d be experimenting with different variations.  You might be wondering what could be better than Nutella and while that question may be hard to answer I can say that peanut butter comes pretty darn close.  Yup, we’re making peanut butter fudge.

Fudge can be kind of tricky and temperamental.  Weather and humidity can all effect the cooking process differently.  My Grandma is usually the one to send us peanut butter fudge around the holidays and it is something to look forward to.  Peanut butter, sugar and sweets are world-dominating combinations.  So, without further torture I’ll get down to business.

Here are some helpful tips to keep in mind:

  1. Like making any kind of fudge, have your ingredients ready to go and already measured so all you have to do is pour.  This method helps keep the steps of making fudge less messy and quicker.
  2. Melt the butter while you’re measuring because it’ll take a little bit.  If you are unsure about your speed, melt the butter on low.
  3. Make sure your stovetop mixture is at a rolling hard boil before you remove it from the heat.  You’ll notice bubbles around the edges and starting in the middle.
  4. Be sure to constantly keep mixing everything to incorporate it and make sure nothing burns.
  5. I replaced the Nutella aspect with peanut butter in a 1-to-1 ratio.  Make sure to use a thick peanut butter, no nut butters because they separate oils too easily.
  6. I used about 1/4 less powdered sugar so that it isn’t too sweet.  You can always add more powdered sugar to give the fudge form.

This fudge is creamy and delicious.  I have to say it is number 1 on the list of things I have made thus far.  It trumps any fudge that I have tried, sorry Gram, and I plan on making more in the future.  I made half of the recipe which is the perfect amount.  There is some to share without you digging in and pigging out–trust me it’s hard.

If you want to go really crazy, you can do half Nutella and half peanut butter fudge for that chocolate, peanut butter craving.  Impress your friends and co-workers with this recipe and send it out for holiday treats.  It’s quick, easy, and tasty: the best kind of sweet.

Leave a comment on your fudge ideas.  Check out my Pinterest.  Be back next Wednesday for more helpful tips from The Cooking Bug.

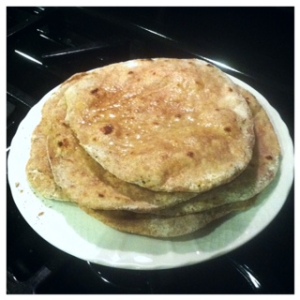
Roti–Indian Flatbread

I love bread! It is a horrible and honest answer, but since I was a child I have enjoyed bread of any kind. I was excited to have found a recipe for what I had thought was naan. However, I was surprisingly excited to understand the differences between naan and what I found to have made, roti. The following describes the subtle differences:

Naan or Nan is a leavened, oven-baked flatbread. It is popular in West, Central and South Asia. In Iran, from which the word ultimately originated, nān does not carry any special significance, as it is merely the everyday word for any kind of bread. Naan in other parts of South Asia usually refers to a specific kind of thick flatbread. Generally, it resembles pita and, like pita bread, is usually leavened with yeast or with bread starter. Naan is cooked in a tandoor, from which tandoori cooking takes its name. This distinguishes it from roti, which is usually cooked on a flat or slightly concave iron griddle called a tava. Typically, it will be served hot and brushed with ghee or butter. It can be used to scoop other foods, or served stuffed with
a filling.

roitindianflatbread

Roti is generally an Indian bread, made from stoneground wholemeal flour, traditionally known as atta flour, that originated and is consumed in India, Pakistan, Nepal, Sri Lanka and Bangladesh. It is also consumed in parts of South Africa, the southern Caribbean–particularly in Trinidad and Tobago–Guyana and Fiji. Its defining characteristic is that it is unleavened. Indian naan bread, by contrast, is a yeast-leavened bread. Roti and its thinner variant, known as chapati, are integral to Indian and Pakistani cuisine

Here are a few tips to keep in mind:

  1. I used whole-wheat flour.
  2. I used more than the amount of water suggested.
  3. You want to create dough that is firm but a cohesive piece.
  4. I mixed the dough in my Kitchen Aide mixer, then I kneaded it to incorporate the missed flour and lost pieces.
  5. I was able to divide my dough into nine balls, probably 12 had I made them evenly sized.
  6. Be sure to roll them thinly. Thicker pieces will leave a doughy texture when cooked.
  7. After rolling them, place them on a cookie sheet layering them with paper towels to keep them from sticking.
  8. Be sure to not over flour them because the flour residue will stick to the naan during the cooking process and be left afterwards. No one likes raw flour.
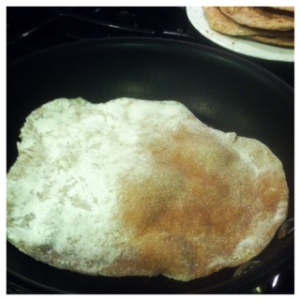
  9. Heat the skillet, without oil or Pam, on high.rotiindianflatbread2
  10. The dough will begin to bubble with air pockets within 30 seconds. Flip the bread immediately to reduce the chance of burning the bread and cook for an additional 30 seconds.
  11. The tops of the naan will be freckled with brown cook spots.
  12. Oil only the top of the naan. Because the bread is thin, the oil will be absorbed on both sides.

Understanding my love for Indian dishes, I am thrilled to understand both the difference between naan and roti and having found a recipe that allow for a traditional bread to accompany my future exotic dishes. Paired with a curried quinoa stew or as a side to a tikka masala, the roti is simple and easy to make. You can even add peanut butter and enjoy as is, like my mother. Hurry though because with friends and family there might not be any left
for you.

Leave a comment with your favorite Indian recipes. Follow my Pinterest for more recipes. Check back again next Wednesday for more tips and tricks from The Cooking Bug.

Garam Masala Hummus

garammasalahummus

Hummus is a great side dip for parties and gatherings; however, store bought hummus can be expensive for the amount you receive. Eating out at Indian restaurants can be expensive as well. Solution? Homemade Hummus–it’s inexpensive and extremely versatile. From garlic to roasted bell pepper, hummus can be appreciated by all taste buds. The garam masala hummus today brings a big bite of the Mediterranean home.

Garam Masala is a popular Indian spice consisting mostly of black and white peppercorn; cloves; black and white cumin seeds; cinnamon and black, brown and green cardamom pods. Some masala may be toasted before use to extract flavor and aroma. Garam refers to the intensity of spices, which one can sense from just a whiff. Surprisingly, there is no single garam masala. Recipes and ingredients differ according to region as well as a chef’s individual preferences. From turmeric to fennel seeds, variations can arise to accompany the dish’s flavor; consequently, most pre-made spice mixes in grocery stores contain the basic ingredients.

Here are some tips to keep in mind:

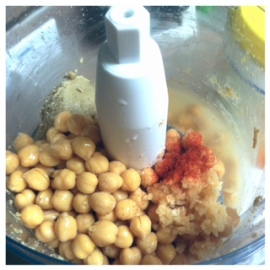
  1. I used homemade tahini, but you can use store bought. Most kinds of tahini are found in the healthy, ethnic or refrigerated sections of your supermarket.
  2. I used bottled lemon juice. If you use fresh, be sure to squeeze the lemon over a mesh colander to keep the seeds and strings from falling into your hummus.
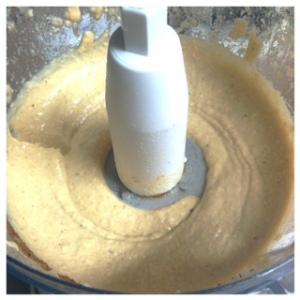
  3. You may want to use more olive oil depending on the consistency of the hummus.
  4. Feel free to add more than a pinch of paprika to balance out the garam masala. I
    love paprika.
  5. Use about ¾ tsp of garam masala and add more to your tasting. It can be a potent spice if you are unfamiliar with the flavors.

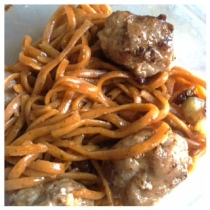
garammasalahummus2Again, hummus makes the perfect party platter or side at lunch.  Pair hummus with chips and crackers or add to a wrap for an extra umph.  There are several variations of hummus to keep your stomach happy. Experiment to find your favorite recipes after trying the garam
masala hummus.

Leave a comment with your favorite hummus dip recipes. Follow my Pinterest for more recipes. Check back again next Wednesday for more tips and tricks from the Cooking Bug.

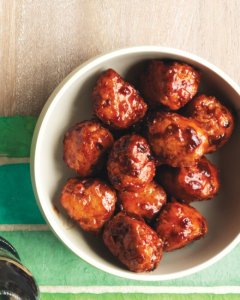
Honey-Chipolte Meatballs

honeychipoltemeatballs2

Sweet and spicy with a tangy punch, these honey-chipolte meatballs are a flavor blaster to any dish.  They will ramp up pasta or sandwich.  Within ten minutes, you’ll have a delicious dish that shine.  Turkey is a great substitute to ground beef with less calories and saturated fats; turkey is even juicier than chicken, so the meatballs won’t dry out.

Here are some tips to keep in mind:

  1. I used turkey sausage instead of ground turkey.  Remove the turkey from the casing and it acts just like paged ground turkey.
  2. I added purple peppers to the mix along with onion for an extra crunch.
  3. Instead of cider vinegar, I used red wine vinegar.  You just need the acidity to balance the sweetness of the honey and spiciness of the chilies.
  4. Be sure to brown the meatballs in a pan before placing them in the oven to prevent them from drying out.
  5. Placing them in the oven allows the turkey to cook through without burning the outside.
  6. Be sure not to burn the sauce by constantly stirring the mix of meatballs in the sauce.  Tip the pan to allow the sauce to gather in one spot.  Then, spoon it evenly onto all
    the meatballs.
  7. I used about 2 sausages and made 8 meatballs, about 4 meatballs per sausage.

honeychipoltemeatballs

These sweet and spicy meatballs will make your mouth sizzle.  They pair well with pasta or as a hoagie with peppers and onion.  It’s a new way to enjoy turkey with flavor that will blow your taste buds away.  Try it the next time you want to spice up your bland pasta.

Leave a comment with how you enjoy ground turkey.  Follow other recipes and dishes on my Pinterest.  Be sure to check back next Wednesday for more tips and tricks from The Cooking Bug.

Sirloin Burger w/Cilantro Cumin Sauce

sirloinburgerw:cuminjalapenosauce2

You might be negotiating with the fact that most doctors recommend staying away from red meats.  While that may be the case, you need to constantly be changing your dietary foods.  Don’t go crazy now that you know the secret, but keep it in mind that a little red meat won’t hurt.  And what can be made best with red meat?  A grilled and juicy burger!

Now, this sirloin burger comes with a punch in the sauce department.  If you’re like me, a little spice can go a long, long way; however, I’ve been learning with Jillian Michael’s Master Your Metabolism recipes that spice is the new black.  It seems that she wants to kick your butt into gear and spice up not only workouts but recipes as well.  This sirloin burger w/cumin jalapeño sauce does her justice.

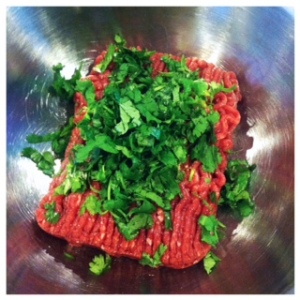
For these 430 calorie burgers serving four you’ll need, 3 jalapeños, cilantro, garlic, 1 tbsp lime juice, 1 tsp cumin, 2 tbsp water, salt, pepper, olive oil for brushing, 4 slices pepper jack cheese, and 1½ lbs sirloin.  Along with those ingredients you’ll need lettuce, tomato, and 1 slice of bread for serving compliments.  Knead the sirloin, ½ cilantro, and ½ tsp cumin for your burgers.  After cooking add your sliced cheese.  All the rest of the ingredients are blended for the sauce.

Here are some helpful tips to keep in mind:

  1. I used a piece of pepper jack on top of the burger.  Incorporating it into the burger will help as a binding factor, but since we’re using sirloin the meat compacts and holds
    well already.
  2. Make sure to wash your hands after handling the jalapenos.  **AT NO TIME SHOULD YOU WIPE YOUR FACE OR EYES**
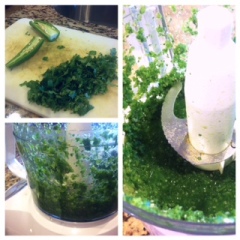
  3. I used a food processor in place of a blender because it’s what I had on hand and I believe they work a little better.
  4. Blend the sauce a few times before taking it out making sure to scrape the sides each time.  This process will prevent large chunks from developing.
  5. I cooked my burgers in the oven instead of the grill only because Arizona can be too hot in the summer standing next to a grill.sirloinburgerw:cuminjalapenosauce

Beware that the sauce is spicy, but it adds a punch of flavor to the burger.  Don’t be hesitant to spread some all over the top.  Even for me, a wimp in the spiciness department went all out.  It evens the flavors and give the burger an
extra UMPH!

Leave a comment on how you handle your spice.  Be sure to follow my Pinterest.  Check back next Wednesday for more tips from The Cooking Bug.

Pumpkin Sage Polenta

pumpkinsagepolenta

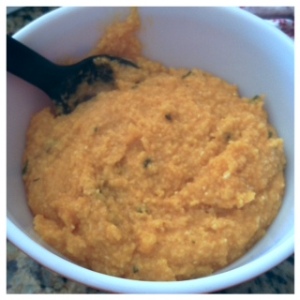
The pumpkin saga continues with a pumpkin sage polenta.  I’m sure my pumpkin recipes outnumber a majority of my other recipes: obsessed much.  I love the soft, moist tenderness that pumpkin tends to add to these dishes.  Pumpkin fits nicely into polenta because it obtains a velvety texture when cooked.  The softness is complimented well with the powerful sage for a complete balance of flavors, texture and delicacy.

As it is known today, polenta derives from earlier forms of grain–puls or pulmentum, more commonly known as gruel or porridge–eaten since Roman times.  Polenta has a creamy texture due to the gelatinization of starch in the grain. However, it may not be completely homogeneous if a coarse grind or hard grain such as flint corn is used.  Historically, polenta is served as a peasant food in North America and Europe, but is considered upscale today.  Polenta is cooked by simmering in a water-based liquid combined with other ingredients.  It is often cooked in a huge copper pot known in Italian as a paiolo.  Polenta is known to be a native dish of and to have originated from Friuli.  Boiled and leftover polenta may be left to set, then baked or fried.

Here are some tips to keep in mind:

  1. Use legit polenta not the pre-made, pre-packaged gross polenta.  It has sodium and preservatives through the roof.
  2. I used homemade pumpkin puree; however, you can use canned pumpkin puree if
    need be.
  3. In place of water, you can use milk for a creamier polenta.  If using milk, nix the cheese
    in half.
  4. Limit the sage.  Sage is a powerful flavor profile, and you do not want to overpower
    the dish.
  5. The parmesan cheese softens the dish as a whole creating a deeper depth of flavor.
  6. You can use salted butter, but nix the salt otherwise.
  7. Be sure to continuously whisk the polenta after boiling to keep the polenta from burning and mix the ingredients.
  8. The polenta will begin to thicken once you begin stirring.
  9. Keep stirring!!!!  Polenta is a corn meal base that requires constant stirring in order to cook correctly.

This dish is the perfect holiday and special occasion meal.  Creamy and dreamy, the silky consistency and decadent aromas will melt in your mouth.  Whipping up the pumpkin sage polenta will add a dash of autumn to your plate.  It’s a sophisticated dish made easy.

Leave a comment with other pumpkin favorites.  Follow my Pinterest for more recipes.  Check back again next Wednesday for more tips and tricks from The Cooking Bug.

Black Bean Soup

blackbeanpumpkinsoup

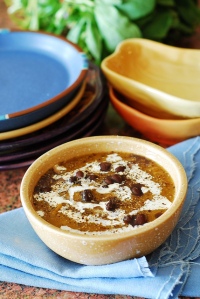
I specifically go to Paradise Bakery, owned by Panera, on Tuesdays because they have black bean soup.  So, I was excited to find a black bean soup favorite soup with a hidden twist.  The smokiness of the black beans and cumin pair well with the sweetness of the pumpkin puree.  Neither flavor is suppressed creating a sweet and savory dish perfect for those cold fall and winter nights.

I recommend making the soup with fresh pumpkin.  Canned pumpkin has added preservatives that change the flavor profiles.  The squash and pumpkin allow for a creamy texture in the soup.  Adding nutmeg creates a sweeter soup; adding jalapenos or adobe chilies creates a spicy soup; adding sour cream on top of the finished product creates a cooling element to the soup.
Photo from Julia

Here are some tips to keep in mind:

  1. I used homemade pumpkin puree since I pretend to live in fall year round, but the recipe works with butternut squash as well.blackbeanpumpkinsoup2
  2. Be sure to have a food processor.  I had a hand one that worked well, but it left a few chunks.
  3. Use vegetable broth for vegetarians.
  4. Use fire-roasted tomatoes for an extra, southwest flavor blast.
  5. I nixed the shallots because it was difficult to find them at the grocery store.  In place of shallots, substitute extra garlic and onion.
  6. Replace the butter with pam to sweat the onions and bringing out the sweetness.  I suggest using red onions because they are sweeter.
  7. The cumin provides a smoky and spicy flavor reminiscent of many Southwest dishes.
  8. I suggest simmering the soup for only 15 minutes or until it becomes thick.  You do not want to overcook the soup and pumpkin.
  9. Homemade pumpkin will create that soft orange color lightly darkened by the beans
    and tomatoes.
  10. I suggest adding the rest of the black beans from the can into the soup because I enjoy chunky soups.

blackbeanpumpkinsoup3The black bean and pumpkin soup combines my two favorite flavors.  I am obsessed with pumpkin, making everyday fall.  I love that this soup can be made and frozen for a day I need a warm pick-up.  A spicy kick and a sweet ending blend the flavors of fall and the southwest.  Be a cowboy in the kitchen!
Leave a comment with your favorite pumpkin recipes.  Follow my Pinterest for more recipes.  Check back again next Wednesday for more tips and tricks from The Cooking Bug.

Roasted Red Pepper and Basil Pesto Penne

roastedredpepperpestopenne

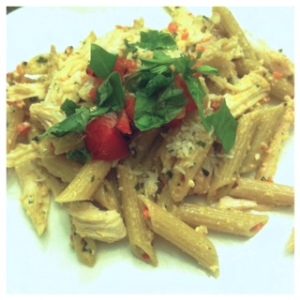
The few times I enjoy pasta I love to use pesto. From ordinary pesto to out of the box recipes, there are variations for all foodies. Roasted red pepper and basil pesto can compliment a volume of dishes. Pasta can be so bland, but elevate it with pesto; chicken can be boring, but change normal with pesto. I enjoy the added note of half and half to create a creamy texture. It softens the dish and creates a tasty dinner for friends and family.

Here are some tips to keep in mind:

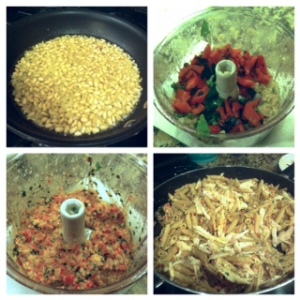
  1. Toasting your pine nuts accentuates their nutty flavor.roastedredpepperpestopenne2
  2. I used a fresh bell pepper. Char the pepper stovetop or broil it to produce a roasted, fresh flavor.
  3. Using fresh basil is the only way to make a pesto.
  4. Olive oil creates that creaminess ideal in pesto and facilitates cohesion among the ingredients.
  5. I used half and half, but you can use heavy cream or evaporated milk in exchange. The point is to add a creamy thickness to your sauce.
  6. I oven roasted a few chicken breasts in place of the rotisserie chicken. It is healthier because there is less butter, and you are using only white meat.
  7. Adding fresh basil on top of the finished dish enhances the brightness of the pesto.
  8. I topped the dish with sun-dried tomatoes; however, roasted or halved cherry tomatoes compliment the dish as well.
  9. I used a hand food processor leaving my pesto chunkier than normal.

I’m a huge fan of red bell peppers; I’m a huge fan of pesto; I’m a huge fan of splurging on pasta. This recipe delivers on all notes of flavor. With a few easy steps and ingredients, you can stretch your wallet without stretching your waistband. Enjoy a splurging pasta dish with the notes above and learn to love eating healthy.

Leave a comment with your favorite pesto recipes. Follow my Pinterest for more recipes. Check back again next Wednesday for more tips and tricks from The Cooking Bug.

Whole Wheat Rolls

wholewheatrolls

Finding fresh, healthy rolls at the grocery store can be a challenge.  Now, you can make your own whole wheat rolls for a healthier side.  These rolls are moist, appropriate in size and healthier than the average white breads.  They can be a bit of a challenge because of their stickiness, but they prove to be delicious.  The rolls pair perfectly with homemade almond butter or my pumpkin pecan butter.

Whole wheat–in its original non-enriched form–is a very good source of dietary fiber and manganese, including enzymes involved in the body’s use of glucose and insulin secretion.  Refined grain products made from white flour have been stripped of essential nutrients needed for good health.  Whole grain products have more fiber than their white counterparts. Most Americans need 25 to 30 grams of fiber per day for good health. Whole grains can supply some of the needed fiber in your diet. Fiber is digested slower, moves food through the digestive system and provides bulk which helps you feel fuller longer.

Here are some tips to keep in mind:

  1. These buns are extremely sticky since they are to be “soft” rolls.wholewheatrolls2
  2. I was able to make 19 rolls.
  3. Using a spoon instead of a whisk keeps the ingredients mixing rather than stuck inside the whisk.
  4. Make sure the milk is warm to keep the ingredients from separating and activates the yeast.
  5. The dough needs to rise twice allowing for the yeast to be active and create a
    fluffy center.
  6. Be sure not to over knead the dough or the bread will not rise.
  7. The first rest did little to my dough, but the second rest doubled my rolls in size.
  8. Cake flour creates a holier, lighter bread mix.
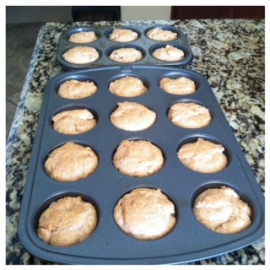
  9. I cooked my rolls in a muffin tin because the dough was extremely sticky.  Making balls/rolls will still work it will just be a sticky mess.
  10. Adding egg wash to the tops of the rolls give them a nice golden brown color and creates a crunchy top.
  11. You can add wheat germ or a type of nut for crunch and texture on top.
  12. Since you are cooking the rolls in the muffin tin, adjust the timing to keep them from burning.  My rolls were a little browner on the sides than I would have liked.
  13. I suggest making the rolls the night before a dinner or early that morning to allow time for cooking and the dough to rise without rushing around like a crazy person.

The rolls may seem like a hassle, but they are completely manageable.  You can build satisfaction knowing that you conquered making rolls healthy.  They contain nutrient-rich whole wheat flour and less preservatives than store bought rolls.  Add these delicious rolls to a soup or family dinner for that extra UMPH.

Leave a comment with your favorite types of rolls.  Follow my Pinterest for more recipes.  Check back again next Wednesday for more tips and tricks from The Cooking Bug.

Beef Enchilada

beefenchilada2

Is Spanish food calling your name?  Beef enchiladas hit the nail on the head putting those Spanish cravings to rest.  I love that this recipe is simple and manageable to any skill level.  It allows for flavor without busting the budget.  Also, the author provides a detailed listing of substitutions and nutritional information to keep track of those pesky calories.  Simple and tasty, these enchiladas open a whole new world into making low calorie meals delicious.

Enchiladas are corn tortillas rolled in a filling and covered in a salsa or chili sauce.  The filling can be mixed from a variety of beans, cheese, meat and seafood.  Enchiladas originated in Mexico, where the practice of rolling tortillas around other food dates back at least to Mayan times.  The people living in the lake region of the Valley of Mexico traditionally ate corn tortillas folded or rolled around small fish.  There are now many varieties, which are distinguished primarily by their sauces, fillings and, in one instance, by their form.  Various adjectives may be used to describe the recipe content or origin.

Here are some tips to keep in mind:

  1. I suggest doubling the recipe because ground beef is packaged in one pound increments.  I was able to make 16 enchiladas.
  2. I used the six-inch yellow and corn tortillas.  You can use larger tortillas and just make less enchilada.
  3. I enjoyed the yellow corn tortillas more because they were a thicker tortilla.
  4. I used yellow and orange peppers.  These peppers add sweetness to any dish.
  5. You can use any type of cheese.  I suggest a sharp cheddar or three cheese Mexican mix.
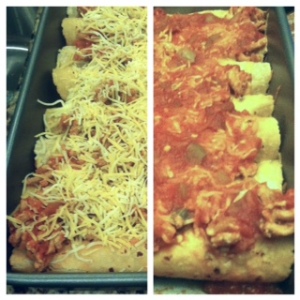
  6. I sprinkled the cheese on top of the completed enchiladas before placing them in theoven.
  7. I used two cans of salsa, one picante and one organic, mild salsa.
  8. I nixed the cilantro because I do not like the minty flavor.
  9. I cooked my enchiladas in the oven for only 15 minutes.  You just need to cook the tortillas and melt the cheese on top.

beefenchiladaVen a probar esta receta!  While most Spanish food is a great balance of nutrient rich tomatoes and ingredients, they can be high in calories.  However, these beef enchiladas are only 330 calories per serving.  You can lessen the carbohydrate intake by using a one semi-larger tortilla and more filling.  Try a variety of fillings and combinations to satisfy your family’s growling stomach.  With only a few ingredients and 20 minutes, you create a Spanish fiesta.


Leave a message with your favorite enchilada sauce and filling.  Follow my Pinterest for more recipes.  Check back again next Wednesday for more tips and tricks from The Cooking Bug.