Spring Rolls

springrolls

I have had spring rolls on my list for some time. I had imagined that the process was rather difficult; however, the difficulties were half the fun. By roll ten, the spring rolls begin to take proper form. The recipe causes a sticky situation with a blast of fresh flavors. From crunch to crisp, there is an abundant of reasons to try these spring rolls at the next gathering.

Daikon, mooli, or white radish is a mild-flavored, large, white East Asian radish with a wide variety of culinary uses. Despite often being associated with Japan, it was originally cultivated in continental Asia. In Japanese cuisine, many types of pickles are made with daikon, including takuan and bettarazuke. Daikon is also frequently used grated and mixed into ponzu–a soy sauce and citrus juice condiment. Simmered dishes such as oden are popular. Daikon is very low in food energy. A 100-gram serving contains only 18 Calories, but it provides 27 percent of the RDA for vitamin C.

Here are some tips to keep in mind:

  1. Rice paper rolls can be found in the Asian department of your supermarket. Ask for help if you can’t find them; they are essential to the whole process.springrolls2
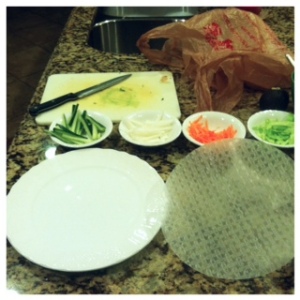
  2. The carrots, cabbage, cucumber and daikon provide a nice crunch and refreshing taste to the rolls.
  3. Tofu can be used for vegan or vegetarian rolls and chicken can be used for more protein packed rolls.
  4. I nixed the green onion just because I did not have it on hand.
  5. The mint leaves and basil would provide freshness to your palate.
  6. The peanut butter will stay clumping in the dipping sauce no matter how fast or much you whisk.
  7. I made the mistake of microwaving my peanut butter and it made the
    sauce seize.
  8. Make the sauce ahead of time allowing the flavors to combine.
  9. Use coconut aminos for a Paleo or gluten free diet.
  10. Wetting the rice paper is essential. It makes the paper flexible, but be careful because it becomes sticky.
  11. Add an equal amount of each ingredient. I suggest adding more filling than you anticipate because an equal volume of rice paper to filling makes a tasty dish.
  12. Trial and error are the staple way to make a spring roll. My first few rolls were
    rather wonky.
  13. Do not be afraid of stretching the rice paper; it will not break.
  14. Fold the spring rolls burrito style–tucking in the sides to keep the filling from falling out.
  15. These rolls need to be eaten immediately. They will be sticky so keep napkins handy.
  16. I had plenty of rice paper left over to make these spring rolls again and again. Keep them sealed and dry for use later.

Now, a taste or Asian cuisine can be enjoyed at home. These tasty spring rolls provide a new twist on appetizers for friends and family. I love the refreshing crunch and vegetable loaded bites. Enjoy the dipping sauce in full force; enjoy the crisp flavors; enjoy a spring in your step and roll.

Leave a comment with your favorite Asian dishes. Follow my Pinterest. Check back again next Wednesday for more tips and tricks from The Cooking Bug.

Roti–Indian Flatbread

I love bread! It is a horrible and honest answer, but since I was a child I have enjoyed bread of any kind. I was excited to have found a recipe for what I had thought was naan. However, I was surprisingly excited to understand the differences between naan and what I found to have made, roti. The following describes the subtle differences:

Naan or Nan is a leavened, oven-baked flatbread. It is popular in West, Central and South Asia. In Iran, from which the word ultimately originated, nān does not carry any special significance, as it is merely the everyday word for any kind of bread. Naan in other parts of South Asia usually refers to a specific kind of thick flatbread. Generally, it resembles pita and, like pita bread, is usually leavened with yeast or with bread starter. Naan is cooked in a tandoor, from which tandoori cooking takes its name. This distinguishes it from roti, which is usually cooked on a flat or slightly concave iron griddle called a tava. Typically, it will be served hot and brushed with ghee or butter. It can be used to scoop other foods, or served stuffed with
a filling.

roitindianflatbread

Roti is generally an Indian bread, made from stoneground wholemeal flour, traditionally known as atta flour, that originated and is consumed in India, Pakistan, Nepal, Sri Lanka and Bangladesh. It is also consumed in parts of South Africa, the southern Caribbean–particularly in Trinidad and Tobago–Guyana and Fiji. Its defining characteristic is that it is unleavened. Indian naan bread, by contrast, is a yeast-leavened bread. Roti and its thinner variant, known as chapati, are integral to Indian and Pakistani cuisine

Here are a few tips to keep in mind:

  1. I used whole-wheat flour.
  2. I used more than the amount of water suggested.
  3. You want to create dough that is firm but a cohesive piece.
  4. I mixed the dough in my Kitchen Aide mixer, then I kneaded it to incorporate the missed flour and lost pieces.
  5. I was able to divide my dough into nine balls, probably 12 had I made them evenly sized.
  6. Be sure to roll them thinly. Thicker pieces will leave a doughy texture when cooked.
  7. After rolling them, place them on a cookie sheet layering them with paper towels to keep them from sticking.
  8. Be sure to not over flour them because the flour residue will stick to the naan during the cooking process and be left afterwards. No one likes raw flour.
  9. Heat the skillet, without oil or Pam, on high.rotiindianflatbread2
  10. The dough will begin to bubble with air pockets within 30 seconds. Flip the bread immediately to reduce the chance of burning the bread and cook for an additional 30 seconds.
  11. The tops of the naan will be freckled with brown cook spots.
  12. Oil only the top of the naan. Because the bread is thin, the oil will be absorbed on both sides.

Understanding my love for Indian dishes, I am thrilled to understand both the difference between naan and roti and having found a recipe that allow for a traditional bread to accompany my future exotic dishes. Paired with a curried quinoa stew or as a side to a tikka masala, the roti is simple and easy to make. You can even add peanut butter and enjoy as is, like my mother. Hurry though because with friends and family there might not be any left
for you.

Leave a comment with your favorite Indian recipes. Follow my Pinterest for more recipes. Check back again next Wednesday for more tips and tricks from The Cooking Bug.

Garam Masala Hummus

garammasalahummus

Hummus is a great side dip for parties and gatherings; however, store bought hummus can be expensive for the amount you receive. Eating out at Indian restaurants can be expensive as well. Solution? Homemade Hummus–it’s inexpensive and extremely versatile. From garlic to roasted bell pepper, hummus can be appreciated by all taste buds. The garam masala hummus today brings a big bite of the Mediterranean home.

Garam Masala is a popular Indian spice consisting mostly of black and white peppercorn; cloves; black and white cumin seeds; cinnamon and black, brown and green cardamom pods. Some masala may be toasted before use to extract flavor and aroma. Garam refers to the intensity of spices, which one can sense from just a whiff. Surprisingly, there is no single garam masala. Recipes and ingredients differ according to region as well as a chef’s individual preferences. From turmeric to fennel seeds, variations can arise to accompany the dish’s flavor; consequently, most pre-made spice mixes in grocery stores contain the basic ingredients.

Here are some tips to keep in mind:

  1. I used homemade tahini, but you can use store bought. Most kinds of tahini are found in the healthy, ethnic or refrigerated sections of your supermarket.
  2. I used bottled lemon juice. If you use fresh, be sure to squeeze the lemon over a mesh colander to keep the seeds and strings from falling into your hummus.
  3. You may want to use more olive oil depending on the consistency of the hummus.
  4. Feel free to add more than a pinch of paprika to balance out the garam masala. I
    love paprika.
  5. Use about ¾ tsp of garam masala and add more to your tasting. It can be a potent spice if you are unfamiliar with the flavors.

garammasalahummus2
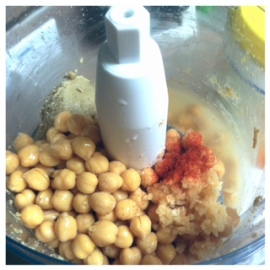
Again, hummus makes the perfect party platter or side at lunch.  Pair hummus with chips and crackers or add to a wrap for an extra umph.  There are several variations of hummus to keep your stomach happy. Experiment to find your favorite recipes after trying the garam
masala hummus.

Leave a comment with your favorite hummus dip recipes. Follow my Pinterest for more recipes. Check back again next Wednesday for more tips and tricks from the Cooking Bug.

Tahini

tahini2

I never thought about the ingredients of tahini. It was not until I tried my hand at making hummus that I took a greater look into the ingredients. Surprise, surprise to find the main ingredients listed: sesame seeds, salt and oil–a lot simpler than I had realized. In a few short minutes, I created an ingredient to add flavor to my favorite Middle Eastern dishes.

Tahini is ground sesame seed paste, similar to peanut butter. It is a creamy, oily and smooth nut butter rich in calcium. Tahini is an important ingredient in Middle Eastern cuisine and recipes such as hummus, baba ghanoush, halva and vegan or goddess dressing. Plain, unprocessed sesame paste with no added ingredients, like the one mentioned here, is known as “raw” tahini. Like many nut butters, tahini is a great source of omega-3 fatty acids, calcium and protein. It supports higher levels of fiber than ordinary peanut butter and lower levels of sugar that compliment many nutritional diets.

Here are some tips to keep in mind:

  1. Use unsalted sunflower seeds. Unsalted seeds allow for you to add salt based on your taste buds.
  2. Roasting the seeds brings forth the nutty flavors that can be hidden.
  3. You can toast them in the oven or stovetop. They take no more than 10 minutes; keep your eyes peeled because they can burn easily.
  4. I used olive oil; blending with olive oil creates an adhesion of creaminess between
    the seeds.
  5. Making your own tahini keeps those pesky preservatives from surfacing into your diet.
  6. Because of tahini’s high oil content, I recommend refrigeration to prevent spoilage.

tahini
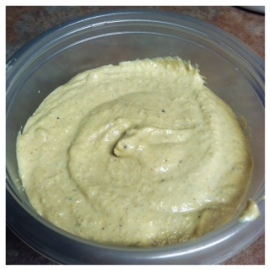
Tahini possesses the ability to transform many ordinary dishes into extraordinary meals. It works for dressings; it works for dips; it works for flavor. The nutritional information of homemade tahini is leaps and bounds above store bought fakers. Who knew simple ingredients and a simple process could make such a flavorful additive to my Middle Eastern cuisines? I do, and now, you do too!

Leave a comment with your nutty, tahini recipes. Follow my Pinterest for more recipes. Check back again next Wednesday for more tips and tricks from The Cooking Bug.

Sushi Trifle

sushitriffle

Deconstructed sushi! I love enjoying sushi at restaurants; however, rolling sushi can be time consuming and takes technique. The sushi trifle satisfies taste without the inconvenience of rolling. It can be plated to impress or mixed for ultimate enjoyment. Mix and match various flavors and ingredients to match sushi at
famous restaurants.

Sushi is a $14 billion industry in Japan. There are types of sushi to fit every taste–vegetables, raw fish, cooked fish and meat are common ingredients. The original type of sushi, known today as nare-zushi, was first made in Southeast Asia, possibly along what is now known as the Mekong River. The term sushi comes from an archaic grammatical form no longer used in other contexts. Literally, sushi means “sour-tasting”, a reflection of its historic fermented roots. The oldest form of sushi in Japan, narezushi, still very closely resembles this process, wherein fish is fermented via being wrapped in soured fermenting rice. The fish proteins break down via fermentation into their constituent amino acids. The fermenting rice and fish results in a sour taste and one of the five basic tastes, called umami in Japanese.

Here are some tips to keep in mind:

  1. I replaced the sushi rice with white rice. Brown and sticky rice work as replacements.
  2. The crumbled nori provides the full sushi roll flavor. It is salty and tastes best when slightly softened.
  3. I nixed the wasabi sauce because I prefer my food non-spicy.
  4. You can stack the ingredients in any fashion. For formal meals and fancy plating, use a clear wine glass and stack the ingredients in layers as seen.
  5. In the future, I suggest mixing the ingredients in a bowl to have all the flavors in
    each bite.
  6. Be sure to cook the salmon unless the sushi deconstruction is calling for raw meat. Be advised as to meats that can be eaten raw and those that need to be cooked.

Sushi has a long history throughout Asia. Methods have changed and contemporized allowing for variety and maximum flavor. While tackling sushi rolls may be challenging, sushi trifles complete flavor and ease. Mix and match favorite sushi rolls to triumph.

Leave a comment with your favorite Asian dishes. Follow my Pinterest. Check back again next Wednesday for more tips and tricks from The Cooking Bug.

Banana Oatmeal Muffins

bananaoatmealbreakfastmuffins2

Overripe bananas on sale at the grocery store or you purchased more than you anticipated eating? Banana oatmeal breakfast muffins are an exceptional way to save “wasted” bananas. Unlike muffins from Starbucks, these easy breakfast or snack treats are free of sugars and loaded with nutritional benefits like flax seeds

Flax seeds come in two basic varieties: brown and yellow (also known as golden linseeds). Most types have similar nutritional characteristics and equal numbers of short-chain omega-3 fatty acids. The exception is a type of yellow flax called solin (trade name Linola), which has a completely different oil profile. Solin is very low in omega-3 fatty acids. Although brown flax can be consumed as readily as yellow, and has been for thousands of years, it is better known as an ingredient in paints, fiber and cattle feed. Flax seeds produce a vegetable oil known as flaxseed or linseed oil–is one of the oldest commercial oils­–and solvent-processed flaxseed oil has been used for centuries as a drying oil in painting and varnishing.

bananaoatmealbreakfastmuffins

Here are some tips to keep in mind:

  1. I like to use Chobani when baking or cooking with Greek yogurt because of its
    thicker texture.
  2. You can use vanilla yogurt just remember to nix the teaspoon of vanilla.
  3. The honey works well to add sweetness to the dish.
  4. Do not use agave!!! Although agave is becoming increasingly popular, agave is made with high fructose corn syrup.
  5. The flax seed is an added nutritional benefit as noted above.
  6. Your bananas should be spotted brown and very ripe. They will mash easily; the riper the banana, the sweeter the taste.
  7. I cooked my muffins at 400 degrees and they were still moist and delicious.
  8. Pulsing the oats in a food processor creates oat flour.
  9. I added pecans to my batter.
  10. The muffins will be dense and moist from using a banana base.

Muffins are always a great way to create a grab-and-go breakfast. The use of sweet bananas and the acidity of the pecans work as a perfect pair. There is room for diversity in ingredients. Try dark chocolate for a dessert muffin; try raisins for a healthier muffin; try strawberries for a fruity muffin. Any way you like it this muffin can offer.

Leave a comment with your favorite muffin mixes. Follow my Pinterest. Check back again next Wednesday for more tips and tricks from The Cooking Bug.

Pumpkin Sage Polenta

pumpkinsagepolenta

The pumpkin saga continues with a pumpkin sage polenta.  I’m sure my pumpkin recipes outnumber a majority of my other recipes: obsessed much.  I love the soft, moist tenderness that pumpkin tends to add to these dishes.  Pumpkin fits nicely into polenta because it obtains a velvety texture when cooked.  The softness is complimented well with the powerful sage for a complete balance of flavors, texture and delicacy.

As it is known today, polenta derives from earlier forms of grain–puls or pulmentum, more commonly known as gruel or porridge–eaten since Roman times.  Polenta has a creamy texture due to the gelatinization of starch in the grain. However, it may not be completely homogeneous if a coarse grind or hard grain such as flint corn is used.  Historically, polenta is served as a peasant food in North America and Europe, but is considered upscale today.  Polenta is cooked by simmering in a water-based liquid combined with other ingredients.  It is often cooked in a huge copper pot known in Italian as a paiolo.  Polenta is known to be a native dish of and to have originated from Friuli.  Boiled and leftover polenta may be left to set, then baked or fried.

Here are some tips to keep in mind:

  1. Use legit polenta not the pre-made, pre-packaged gross polenta.  It has sodium and preservatives through the roof.
  2. I used homemade pumpkin puree; however, you can use canned pumpkin puree if
    need be.
  3. In place of water, you can use milk for a creamier polenta.  If using milk, nix the cheese
    in half.
  4. Limit the sage.  Sage is a powerful flavor profile, and you do not want to overpower
    the dish.
  5. The parmesan cheese softens the dish as a whole creating a deeper depth of flavor.
  6. You can use salted butter, but nix the salt otherwise.
  7. Be sure to continuously whisk the polenta after boiling to keep the polenta from burning and mix the ingredients.
  8. The polenta will begin to thicken once you begin stirring.
  9. Keep stirring!!!!  Polenta is a corn meal base that requires constant stirring in order to cook correctly.

This dish is the perfect holiday and special occasion meal.  Creamy and dreamy, the silky consistency and decadent aromas will melt in your mouth.  Whipping up the pumpkin sage polenta will add a dash of autumn to your plate.  It’s a sophisticated dish made easy.

Leave a comment with other pumpkin favorites.  Follow my Pinterest for more recipes.  Check back again next Wednesday for more tips and tricks from The Cooking Bug.

Beef Enchilada

beefenchilada2

Is Spanish food calling your name?  Beef enchiladas hit the nail on the head putting those Spanish cravings to rest.  I love that this recipe is simple and manageable to any skill level.  It allows for flavor without busting the budget.  Also, the author provides a detailed listing of substitutions and nutritional information to keep track of those pesky calories.  Simple and tasty, these enchiladas open a whole new world into making low calorie meals delicious.

Enchiladas are corn tortillas rolled in a filling and covered in a salsa or chili sauce.  The filling can be mixed from a variety of beans, cheese, meat and seafood.  Enchiladas originated in Mexico, where the practice of rolling tortillas around other food dates back at least to Mayan times.  The people living in the lake region of the Valley of Mexico traditionally ate corn tortillas folded or rolled around small fish.  There are now many varieties, which are distinguished primarily by their sauces, fillings and, in one instance, by their form.  Various adjectives may be used to describe the recipe content or origin.

Here are some tips to keep in mind:

  1. I suggest doubling the recipe because ground beef is packaged in one pound increments.  I was able to make 16 enchiladas.
  2. I used the six-inch yellow and corn tortillas.  You can use larger tortillas and just make less enchilada.
  3. I enjoyed the yellow corn tortillas more because they were a thicker tortilla.
  4. I used yellow and orange peppers.  These peppers add sweetness to any dish.
  5. You can use any type of cheese.  I suggest a sharp cheddar or three cheese Mexican mix.
  6. I sprinkled the cheese on top of the completed enchiladas before placing them in theoven.
  7. I used two cans of salsa, one picante and one organic, mild salsa.
  8. I nixed the cilantro because I do not like the minty flavor.
  9. I cooked my enchiladas in the oven for only 15 minutes.  You just need to cook the tortillas and melt the cheese on top.

beefenchilada
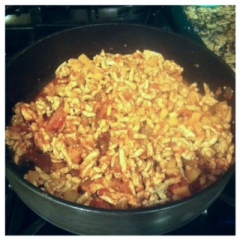
Ven a probar esta receta!  While most Spanish food is a great balance of nutrient rich tomatoes and ingredients, they can be high in calories.  However, these beef enchiladas are only 330 calories per serving.  You can lessen the carbohydrate intake by using a one semi-larger tortilla and more filling.  Try a variety of fillings and combinations to satisfy your family’s growling stomach.  With only a few ingredients and 20 minutes, you create a Spanish fiesta.


Leave a message with your favorite enchilada sauce and filling.  Follow my Pinterest for more recipes.  Check back again next Wednesday for more tips and tricks from The Cooking Bug.

Paprika Spiced Vegetables

paprikaspicedveggies

My favorite items to buy at the famer’s market are the colorful carrots.  They come in purple; they come in white; they come in orange.  Each color has a different flavor; mixed together they create a vibrant side dish.  The purple carrots happen to be my favorite providing sweetness; the white carrots taste closer to parsnips; the orange carrots have an earthy taste to them.  Peeled, sliced, seasoned and cooked, the carrots are one of my favorite side dishes with a low-calorie, nutritious benefit.

Carrots are plentiful in various vitamins.  One medium carrot contains 204% of your daily recommended value of vitamin A.  They are a good source of vitamins K and C.  Vitamin K maintains your blood’s ability to clot and contributes to bone and kidney strength.  Vitamin C is associated with a healthy immune system and strong gums.  It helps your body absorb iron.  Among those valuable reasons to eat carrots, carrots provide you with 7% of the daily recommended value.

Here are some tips to keep in mind:

  1. I cook my carrots for about 40 minutes flipping them halfway through at 350 F.  If you are in a rush, you can use aluminum foil and cook the carrots in about 25-30 minutes.
  2. Spray pam on a baking sheet to keep the carrots from sticking.
  3. I spray my carrots with pam before seasoning them to allow the spices to adhere.
  4. Be sure to peel the carrots and cut them in even pieces.
  5. Space the carrots evenly along the tray and sprinkle them with paprika.
  6. You can add other root vegetables to the mix just be sure to adjust cooking times, and keep the other vegetables around the same size.

paprikaspicedveggies3
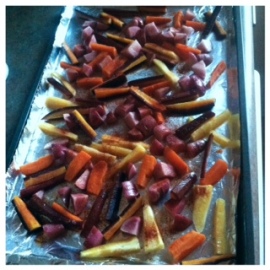
These paprika spiced vegetables won’t stay on the table for long.  Spices are a great way to mask the taste of vegetables and provide them with flavor.  It mixes up the monotony of the daily vegetables.  Check your local farmer’s market or grocery store for your favorite vegetable and try a hand with your own spice mixture.

Leave a comment with your favorite farmer’s market finds.  Follow my Pinterest for more recipes.  Be sure to check back again next Wednesday for more tips and tricks from The Cooking Bug.

Whole-Wheat Honey Bread


honeywheatbread3

Since I was a kid, I have always loved bread; however, breads need to be eaten in moderation.  Making homemade bread can warm your house and provide aromas to your senses.  This whole-wheat honey bread takes me back to the days where my grandparents baked everything from scratch or my mother would take us to the local bakery.  In other countries, making bread is standard.  Rarely do individuals buy pre-processed Wonderbread from a grocery store.

honeywheatbread2
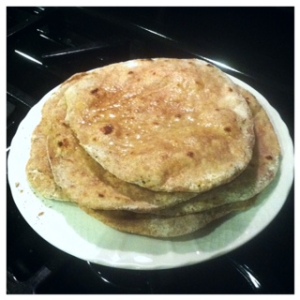
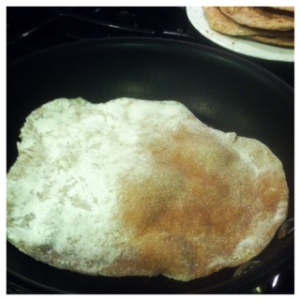
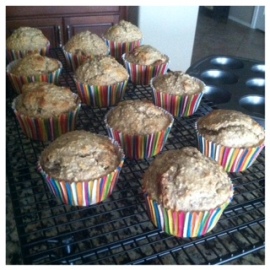
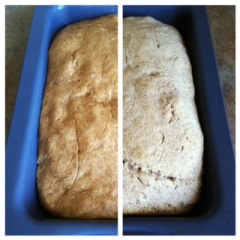
After baking, there is nothing better than eating a warm piece of freshly baked bread as a sandwich, side dish or peanut butter lathered snack.  Using whole-wheat flour can increase the health benefits such as dietary fiber leaning towards less weight gain.  If you are like me, insulin resistant, whole-wheat grains can help reverse the cycle along with other necessary precautions.  The high fiber and low glycemic index of whole wheat grains allows for a well balanced diet when reaching for those carbohydrate filled breads.


Here are some tips to keep in mind:

  1. I used regular whole-wheat flour in place of bread flour.  It made the bread denser, but every piece was like the center: gooey and delicious.honeywheatbread
  2. I suggest melting the butter before adding it to the milk.  This allows the milk to keep its temperature and having to take time to mix until the butter melts.
  3. You’ll need a dough hook for this recipe.  Dough hooks keep incorporating the mixture without flour and pieces getting stuck in the center of a whisk.
  4. You can mix the dough with your hands in place of dough hooks.  Be sure to knead it well and flour your hands.
  5. Allowing the dough to rise is important.  It should triple in size by the time it is ready to cook.  Do not rush this process.
  6. Allow the bread to cool before setting it on the cooling rack.  It will harden and keep its form better.
  7. I cut my bread into slices before packing it away.  Allow it to cool so that you don’t smash the bread in the process.

Making bread is a process that takes time.  It needs to rise and rest allowing the gluten structure to become finer and preventing large air holes in the bread.  Also, it provides texture to the bread and permits the yeast to convert more sugars from the flour giving you a nice flavor complexity.  The bread will be delicious along with your satisfaction of making food from scratch.  Scrap all those pesky preservatives and aim for a higher goal.  The bread can last for two weeks in the cupboard or fridge and about one month frozen.  Lather it with nut butter or pumpkin pecan butter for a delicious pairing.  The sweetness of the honey and the nuttiness of the butters create a mouth-watering delicacy.

Leave a comment with your favorite bread recipes.  Follow my Pinterest for more recipes.  Check back again next Wednesday for more tips and tricks from The Cooking Bug.