Spinach and Gruyere Stuffed Tilapia

spinach&gruyerestuffedtilapia

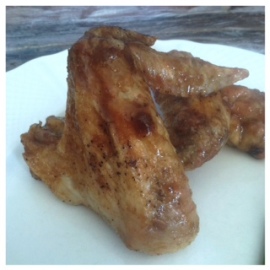
Fish Friday is weekly event my family likes to keep in mind; however, there are only so many ways to enjoy fish–or is there? Tilapia is a bland, tender cichlid fish. Thus, it works spectacular when paired with the strong flavor of Gruyere. The spinach and Gruyere stuffed tilapia works in making tilapia shine and fish Fridays a staple in all households.

Tilapia is mainly a freshwater fish, inhabiting shallow streams, ponds, rivers and lakes; the fish is less commonly found living in brackish water. Historically, tilapia was one of the three main types of fish caught in Biblical times from the Sea of Galilee. Tilapia, which is itself a latinisation of thiape, is the Tswana word for fish. They typically have laterally compressed, deep bodies. The fillets are skinless, boneless and found commonly in grocery stores. Tilapia consists of low levels of mercury and fast-growing, lean protein rich bodies. With a primary vegetarian diet, they are low in saturated fat, sodium and calories–a great addition to healthy meals.

Here are some tips to keep in mind:

  1. I suggest using Pam in place of the oil. Greasy onions gross me out, so if using oil reduce the amount. Also, the fish really does not need to be oiled before entering the oven.
  2. I used the same amount of stuffing for 4 fillets; keep that ratio in mind when re-creating this dish.
  3. Line the baking dish with foil to allow for an easy cleanup.
  4. I used extra spinach. Greens are your friends with zero calories so indulge.
  5. I used lemon juice in place of a fresh lemon because it is what I had on hand. If not using a fresh lemon, add the lemon to taste.
  6. Let the vegetables cools before adding the other ingredients. Adding the egg and cheese in too early will scramble the egg and melt the cheese creating a gooey mess.
  7. You can cut the fillets or roll them as is. They will be difficult either way.
  8. Extra filling I placed along the sides of the fillets in the pan to cook.
  9. Use a toothpick and place the fillets face down to keep them from unraveling.
  10. When finished cooking, tilapia will be opaque in color and tender to the touch.

The dish is a wonderful way to enjoy tilapia. Originally bland and boring, adding a touch of Gruyere and the health benefits of spinach–Popeye–creates an intricate dish. Pair the meal with green beans and roasted potatoes for a nutritiously balanced dinner fit for any family. Try adding other vegetables and cheese to compliment your fishy tastes. There are no wrong stuffing or flavors that tilapia won’t absorb.

Leave a comment with your favorite fishy flavors. Follow my Pinterest for more recipes. Check back again next Wednesday for more tips and tricks from The Cooking Bug.

Teriyaki Chicken Wings

TeriyakiChickenWings

Added advantage of being on a paleo diet is that I can gorge on these delicious teriyaki chicken wings. Unlike diets with heavy carbohydrates, the paleo diet is heavy in protein and fats allowing me to enjoy in the skin and all. These wings deliver on all notes. The sauce combines sweet and salty tangs with a meaty juiciness.

Teriyaki is a cooking technique used in Japanese cuisine in which foods are broiled or grilled with a glaze of soy sauce, mirin and sugar. The word teriyaki derives from the noun teri–the shine or luster given by the sugar content in the tare–and yaki–the cooking method of grilling or broiling. Traditionally, the meat is dipped in or brushed with sauce several times during cooking. In North America, any dish made with a teriyaki-like sauce or with added ingredients such as sesame or garlic (uncommon in traditional Japanese cuisine), is described as teriyaki. Pineapple juice is usually used as it not only provides sweetness but also bromelain enzymes that help tenderize the meat.

Here are some tips to keep in mind:

  1. I used chicken wings. They combine both the drumettes and wings into one; however, using just wings or just drumettes is optional.
  2. I used coconut aminos for a paleo version. Using soy sauce will provide the same flavor, but it is not gluten free.
  3. I used honey for my sweetener. I think it is not overly sweet and works well as a thickening agent for a sauce.
  4. TeriyakiChickenWings2Careful using fresh ginger because it will cause chunks in the sauce that can be potent.
  5. Broiling works well in browning the outside skin without overcooking the meat inside.
  6. Cooking the wings skin side down for the first ten minutes, allows the meat to cook through without burning the skin.
  7. The sauce is easy! Mix all the ingredients until the desired thickness.
  8. The sauce will continue to thicken and cook after being removed from the heat, so I suggest not boiling it over seven minutes.
  9. Toss the wings evenly to coat the
    wings evenly.

Napkins will be your best friends with this meal. It is finger licking good, but on the sticky side. I could have continued to eat the entire batch myself. Keep that in mind and be sure to double or triple the meal, inviting friends and family to come and enjoy the dish. It is a quick and easy meal for reunions and parties. Have everyone over to enjoy some wings and wow them with the sweet and salty crunch of these meaty wings.

Leave a comment with your favorite wing sauce. Follow my Pinterest. Check back again next Wednesday for more tips and tricks from The Cooking Bug.

Zoodles

Zoodles2Is it a poodle? Is it a noodle? It’s zucchini noodles!!!!! Or as many like to call them the famous zoodles—perfect for low carb or Paleolithic diets. These surprisingly tasty substitutes for noodles are quicker to cook and full of beneficial nutritional treats. From boring and bland to pizzazz and pop, zoodles add both flavor and color to any dish.

Zucchini provides only 17 calories per 100 g. It contains no saturated fats or cholesterol. The peel is good source of dietary fiber that helps reduce constipation and offers some protection against colon cancers. Zucchinis can be available all around the year, but they are at their best during late spring and summer seasons. In the stores, choose small to medium-sized zucchini featuring shiny, bright green skin, firm and heavy in hand. The best size for zucchini is 6 to 8 inches length and 2 inches or less in diameter. Some big sized varieties with marrow are specially grown for stuffing. Minor superficial scratches and mild bruises oftentimes seen on their surface are perfectly fine. Avoid overly mature, large zucchini with pitted skin, and those with flabby or spongy textured. Furthermore, avoid those with soft and wrinkled ends as they indicate old stock.

Zoodles3

Here are some helpful tips to keep in mind:

  1. For this recipe, use fresher zucchini. Zucchini that has been sitting around becomes too watery and is hard to spiral/peel.
  2. You can use different tools to create zoodles: a sprialer or a ribbed peeler. I used a ribbed peeler.
  3. You can peel the skin off the zucchini, but my preference is to keep it on. It creates a nice contrasting light and dark green of color to the dish.
  4. Sauté the zucchini in a heated pan of olive oil or coconut oil. Start out with less oil than you think you’ll need because you can always add more in.
  5. Toss the zucchini a couple of times while cooking to keep it from burning and cooking through evenly.

Zoodles
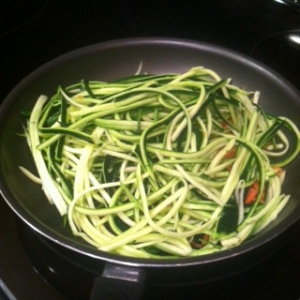
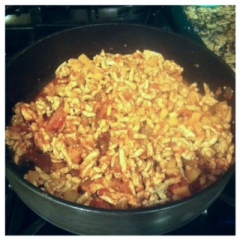
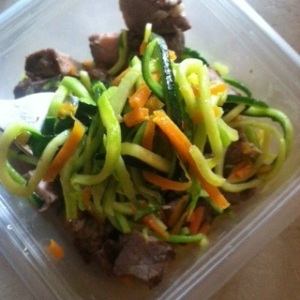
Zoodles trending popularity comes with the new wave of low carb dietary restrictions and healthier substitutions. Unlike heavy pastas, zoodles offer a low calorie, zero carb vegetable to your plate. Cooked properly, the zucchini turns a vibrant green that makes my heart melt and my mouth water. I love using fresh zucchini from the farmers market because the zucchini tends to be in better form. Whatever your reason, zoodles are a great way to enjoy vegetables and mix up your diet.

Leave a comment with your favorite zoodle addition: meat, sauce, pesto or more the options are endless. Follow my Pinterest for more recipes to try. Check back again next Wednesday for more tips and tricks from The Cooking Bug.

Chicken Shawarma

chickenshawarma3

My cabinets are brimming with spices.  Spices allow for big taste without the heavy calories.  I imagined that making a shawarma dish would be rather difficult because I lacked the usual cooking utensils.  I lack the space and budget for a large rotating-roaster; however, I found this chicken shawarma recipe that does my taste buds justice.  With a few easy steps, you can have an authentic, Arabic dish to satisfy a rumbling tummy.

Shawarma is an Arabic meat preparation, where lamb, chicken, turkey, beef, veal or mixed meats are placed on a spit (commonly a vertical spit in restaurants), and may be grilled for as long as a day.  Shawarma is made by alternately stacking strips of fat and pieces of seasoned meat on a stick.  An onion, a tomato, or a halved lemon is sometimes placed at the top of the stack for additional flavoring.  Shavings are cut off the block of meat for serving, and the remainder of the block of meat is kept heated on the rotating spit.  Although it can be served in shavings on a plate (generally with accompaniments), shawarma also refers to a sandwich or wrap made with shawarma meat.  Shawarma is usually eaten with tabbouleh, fattoush, taboon bread, tomato and cucumber.  Toppings can include tahini, hummus, pickled turnips and amba. It is similar to Turkish döner kebab and Greek gyros.

Here are some tips to keep in mind:

  1. I halved the recipe by using just one package of chicken rather than two (two pounds).chickenshawarma
  2. It is important to marinade the chicken overnight allowing the spices and flavors to be absorbed.
  3. I decided to keep my breast whole and making cross cuts.
  4. In place of cayenne, I used chili powder.  Add a little, or add a lot for a kick of spice.
  5. I cooked my chicken in the oven at 350 degrees for about 25 minutes.
  6. I nixed the second part of the recipe because I did not want to overcook the chicken and thought it worked well in a spice balance.
  7. I suggest following it more closely for a more traditional shawarma.
  8. Cutting the chicken into strips allows for more marinating to take place.
  9. The chicken works well in pitas with hummus or baba ghanoush.

Arabic dishes are heavily seasoned with various combined spices to obtain a certain flavor.  The dishes are decadent and a party in the mouth.  They are complicated meals made simple.

Leave a comment with your favorite Arabic dishes.  Follow my Pinterest for more recipes.  Check back again next Wednesday for more tips and tricks from The Cooking Bug.

Curried Quinoa Stew

curriedquinoastew

Quinoa is thriving in the new year. People, like myself, are enjoying the seed that offers vast amount of protein per carbohydrate. It can run close in comparison to the textures of couscous or pearl barley and works as a gluten free, nutritional powerhouse. The addition of quinoa to stews works perfectly because the seed grows and cooks in a liquid base. So, jumping on the quinoa bandwagon, the curried quinoa stew delivers on all notes.

curriedquinoastew2

Curry, is the generic English term primarily employed in Western culture to denote a wide variety of dishes whose origins are Southern and Southeastern Asian cuisines, as well as New World cuisines influenced by them such as Trinidadian, Mauritian or Fijian. In originaltraditional cuisines, the precise selection of spices for each dish is a matter of national or regional cultural tradition, religious practice and, to some extent, family preference. Curry powder, a commercially prepared mixture of spices, is largely a Western notion, dating to the 18th century. Such mixtures are commonly thought to have first been prepared by Indian merchants for sale to members of the British Colonial government and army returning to Britain. Curries may be either wet or dry. Wet curries contain significant amounts of sauce or gravy based on yogurt, coconut milk, legume purée (dal) or stock. Dry curries are cooked with very little liquid that is allowed to evaporate, leaving the other ingredients coated with the spice mixture. The main spices found in most South Asian curry powders are turmeric, coriander and cumin; a wide range of additional spices may be included depending on the geographic region.

Here are a few tips to keep in mind:

  1. I used baby carrots in place of chopping a large carrot.
  2. Using fresh ginger is essential in curry related meals. It adds depth and a more authentic taste to the dish.
  3. I made my own curry powder. It is an equal mixture of turmeric, ground cumin, coriander and cayenne (optional).
  4. I used tomato sauce. I do not care for tomatoes and the sauce thickens the stew without leaving chunks.
  5. You can use vegetable broth for a vegetarian dish.
  6. I used white kidney beans in place of black beans. It was by random chance that I mixed the two cans up; however, I feel the kidney beans work better to balance the dish whereas black beans would overpower the flavors.
  7. The nut buttes add a depth of flavor to the dish and a creaminess to the soup. Also, it provides a hint of the end color.
  8. I nixed the cilantro because I do not care for the minty Mexican spice.
  9. Use a fair amount of spinach because it will wilt in the stew. Tearing it can be essential in dispersing the spinach evenly without spinach balls.
  10. I liked to cook my dish in my dutch oven. It works equally to a large pot, but the spices and flavors of curry will sink into the soul of your dutch oven: YUM!
  11. After adding the quinoa, stir the dish occasionally to keep it from burning. You will begin to notice that the stew becomes thicker as the quinoa absorbs the liquid while
    being tossed.
  12. Similar to the quinoa chili I have created in the past, you could substitute the carrots with sweet potatoes. Keep in mind that your nutritional information would then change as well since carrots are low in calories.

I have a knack for enjoying Indian dishes. Curry’s potent flavors and aroma are one of my favorite spices to work with. It can transform dishes into wonderful meals. I enjoy that curries and Indian dishes incorporate a vast amount of spices: meaning I can obtain flavor without calories. From the nuttiness of the peanut butter to the protein of the quinoa, my stomach was dancing after enjoying the meal. Eaten on a cold winter night or for an Indian flared party, the dish will wow friends and family alike.

Leave a comment with your favorite Indian recipes. Follow my Pinterest for more recipes. Check back again next Wednesday for more tips and tricks from The Cooking Bug.

Pumpkin Sage Polenta

pumpkinsagepolenta

The pumpkin saga continues with a pumpkin sage polenta.  I’m sure my pumpkin recipes outnumber a majority of my other recipes: obsessed much.  I love the soft, moist tenderness that pumpkin tends to add to these dishes.  Pumpkin fits nicely into polenta because it obtains a velvety texture when cooked.  The softness is complimented well with the powerful sage for a complete balance of flavors, texture and delicacy.

As it is known today, polenta derives from earlier forms of grain–puls or pulmentum, more commonly known as gruel or porridge–eaten since Roman times.  Polenta has a creamy texture due to the gelatinization of starch in the grain. However, it may not be completely homogeneous if a coarse grind or hard grain such as flint corn is used.  Historically, polenta is served as a peasant food in North America and Europe, but is considered upscale today.  Polenta is cooked by simmering in a water-based liquid combined with other ingredients.  It is often cooked in a huge copper pot known in Italian as a paiolo.  Polenta is known to be a native dish of and to have originated from Friuli.  Boiled and leftover polenta may be left to set, then baked or fried.

Here are some tips to keep in mind:

  1. Use legit polenta not the pre-made, pre-packaged gross polenta.  It has sodium and preservatives through the roof.
  2. I used homemade pumpkin puree; however, you can use canned pumpkin puree if
    need be.
  3. In place of water, you can use milk for a creamier polenta.  If using milk, nix the cheese
    in half.
  4. Limit the sage.  Sage is a powerful flavor profile, and you do not want to overpower
    the dish.
  5. The parmesan cheese softens the dish as a whole creating a deeper depth of flavor.
  6. You can use salted butter, but nix the salt otherwise.
  7. Be sure to continuously whisk the polenta after boiling to keep the polenta from burning and mix the ingredients.
  8. The polenta will begin to thicken once you begin stirring.
  9. Keep stirring!!!!  Polenta is a corn meal base that requires constant stirring in order to cook correctly.

This dish is the perfect holiday and special occasion meal.  Creamy and dreamy, the silky consistency and decadent aromas will melt in your mouth.  Whipping up the pumpkin sage polenta will add a dash of autumn to your plate.  It’s a sophisticated dish made easy.

Leave a comment with other pumpkin favorites.  Follow my Pinterest for more recipes.  Check back again next Wednesday for more tips and tricks from The Cooking Bug.

Black Bean Soup

blackbeanpumpkinsoup

I specifically go to Paradise Bakery, owned by Panera, on Tuesdays because they have black bean soup.  So, I was excited to find a black bean soup favorite soup with a hidden twist.  The smokiness of the black beans and cumin pair well with the sweetness of the pumpkin puree.  Neither flavor is suppressed creating a sweet and savory dish perfect for those cold fall and winter nights.

I recommend making the soup with fresh pumpkin.  Canned pumpkin has added preservatives that change the flavor profiles.  The squash and pumpkin allow for a creamy texture in the soup.  Adding nutmeg creates a sweeter soup; adding jalapenos or adobe chilies creates a spicy soup; adding sour cream on top of the finished product creates a cooling element to the soup.
Photo from Julia

Here are some tips to keep in mind:

  1. I used homemade pumpkin puree since I pretend to live in fall year round, but the recipe works with butternut squash as well.blackbeanpumpkinsoup2
  2. Be sure to have a food processor.  I had a hand one that worked well, but it left a few chunks.
  3. Use vegetable broth for vegetarians.
  4. Use fire-roasted tomatoes for an extra, southwest flavor blast.
  5. I nixed the shallots because it was difficult to find them at the grocery store.  In place of shallots, substitute extra garlic and onion.
  6. Replace the butter with pam to sweat the onions and bringing out the sweetness.  I suggest using red onions because they are sweeter.
  7. The cumin provides a smoky and spicy flavor reminiscent of many Southwest dishes.
  8. I suggest simmering the soup for only 15 minutes or until it becomes thick.  You do not want to overcook the soup and pumpkin.
  9. Homemade pumpkin will create that soft orange color lightly darkened by the beans
    and tomatoes.
  10. I suggest adding the rest of the black beans from the can into the soup because I enjoy chunky soups.

blackbeanpumpkinsoup3
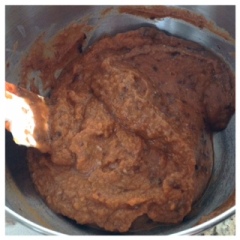
The black bean and pumpkin soup combines my two favorite flavors.  I am obsessed with pumpkin, making everyday fall.  I love that this soup can be made and frozen for a day I need a warm pick-up.  A spicy kick and a sweet ending blend the flavors of fall and the southwest.  Be a cowboy in the kitchen!

Leave a comment with your favorite pumpkin recipes.  Follow my Pinterest for more recipes.  Check back again next Wednesday for more tips and tricks from The Cooking Bug.

Roasted Red Pepper and Basil Pesto Penne

roastedredpepperpestopenne

The few times I enjoy pasta I love to use pesto. From ordinary pesto to out of the box recipes, there are variations for all foodies. Roasted red pepper and basil pesto can compliment a volume of dishes. Pasta can be so bland, but elevate it with pesto; chicken can be boring, but change normal with pesto. I enjoy the added note of half and half to create a creamy texture. It softens the dish and creates a tasty dinner for friends and family.

Here are some tips to keep in mind:

  1. Toasting your pine nuts accentuates their nutty flavor.roastedredpepperpestopenne2
  2. I used a fresh bell pepper. Char the pepper stovetop or broil it to produce a roasted, fresh flavor.
  3. Using fresh basil is the only way to make a pesto.
  4. Olive oil creates that creaminess ideal in pesto and facilitates cohesion among the ingredients.
  5. I used half and half, but you can use heavy cream or evaporated milk in exchange. The point is to add a creamy thickness to your sauce.
  6. I oven roasted a few chicken breasts in place of the rotisserie chicken. It is healthier because there is less butter, and you are using only white meat.
  7. Adding fresh basil on top of the finished dish enhances the brightness of the pesto.
  8. I topped the dish with sun-dried tomatoes; however, roasted or halved cherry tomatoes compliment the dish as well.
  9. I used a hand food processor leaving my pesto chunkier than normal.

I’m a huge fan of red bell peppers; I’m a huge fan of pesto; I’m a huge fan of splurging on pasta. This recipe delivers on all notes of flavor. With a few easy steps and ingredients, you can stretch your wallet without stretching your waistband. Enjoy a splurging pasta dish with the notes above and learn to love eating healthy.

Leave a comment with your favorite pesto recipes. Follow my Pinterest for more recipes. Check back again next Wednesday for more tips and tricks from The Cooking Bug.

Whole Wheat Rolls

wholewheatrolls

Finding fresh, healthy rolls at the grocery store can be a challenge.  Now, you can make your own whole wheat rolls for a healthier side.  These rolls are moist, appropriate in size and healthier than the average white breads.  They can be a bit of a challenge because of their stickiness, but they prove to be delicious.  The rolls pair perfectly with homemade almond butter or my pumpkin pecan butter.

Whole wheat–in its original non-enriched form–is a very good source of dietary fiber and manganese, including enzymes involved in the body’s use of glucose and insulin secretion.  Refined grain products made from white flour have been stripped of essential nutrients needed for good health.  Whole grain products have more fiber than their white counterparts. Most Americans need 25 to 30 grams of fiber per day for good health. Whole grains can supply some of the needed fiber in your diet. Fiber is digested slower, moves food through the digestive system and provides bulk which helps you feel fuller longer.

Here are some tips to keep in mind:

  1. These buns are extremely sticky since they are to be “soft” rolls.wholewheatrolls2
  2. I was able to make 19 rolls.
  3. Using a spoon instead of a whisk keeps the ingredients mixing rather than stuck inside the whisk.
  4. Make sure the milk is warm to keep the ingredients from separating and activates the yeast.
  5. The dough needs to rise twice allowing for the yeast to be active and create a
    fluffy center.
  6. Be sure not to over knead the dough or the bread will not rise.
  7. The first rest did little to my dough, but the second rest doubled my rolls in size.
  8. Cake flour creates a holier, lighter bread mix.
  9. I cooked my rolls in a muffin tin because the dough was extremely sticky.  Making balls/rolls will still work it will just be a sticky mess.
  10. Adding egg wash to the tops of the rolls give them a nice golden brown color and creates a crunchy top.
  11. You can add wheat germ or a type of nut for crunch and texture on top.
  12. Since you are cooking the rolls in the muffin tin, adjust the timing to keep them from burning.  My rolls were a little browner on the sides than I would have liked.
  13. I suggest making the rolls the night before a dinner or early that morning to allow time for cooking and the dough to rise without rushing around like a crazy person.

The rolls may seem like a hassle, but they are completely manageable.  You can build satisfaction knowing that you conquered making rolls healthy.  They contain nutrient-rich whole wheat flour and less preservatives than store bought rolls.  Add these delicious rolls to a soup or family dinner for that extra UMPH.

Leave a comment with your favorite types of rolls.  Follow my Pinterest for more recipes.  Check back again next Wednesday for more tips and tricks from The Cooking Bug.

Beef Enchilada

beefenchilada2

Is Spanish food calling your name?  Beef enchiladas hit the nail on the head putting those Spanish cravings to rest.  I love that this recipe is simple and manageable to any skill level.  It allows for flavor without busting the budget.  Also, the author provides a detailed listing of substitutions and nutritional information to keep track of those pesky calories.  Simple and tasty, these enchiladas open a whole new world into making low calorie meals delicious.

Enchiladas are corn tortillas rolled in a filling and covered in a salsa or chili sauce.  The filling can be mixed from a variety of beans, cheese, meat and seafood.  Enchiladas originated in Mexico, where the practice of rolling tortillas around other food dates back at least to Mayan times.  The people living in the lake region of the Valley of Mexico traditionally ate corn tortillas folded or rolled around small fish.  There are now many varieties, which are distinguished primarily by their sauces, fillings and, in one instance, by their form.  Various adjectives may be used to describe the recipe content or origin.

Here are some tips to keep in mind:

  1. I suggest doubling the recipe because ground beef is packaged in one pound increments.  I was able to make 16 enchiladas.
  2. I used the six-inch yellow and corn tortillas.  You can use larger tortillas and just make less enchilada.
  3. I enjoyed the yellow corn tortillas more because they were a thicker tortilla.
  4. I used yellow and orange peppers.  These peppers add sweetness to any dish.
  5. You can use any type of cheese.  I suggest a sharp cheddar or three cheese Mexican mix.
  6. I sprinkled the cheese on top of the completed enchiladas before placing them in theoven.
  7. I used two cans of salsa, one picante and one organic, mild salsa.
  8. I nixed the cilantro because I do not like the minty flavor.
  9. I cooked my enchiladas in the oven for only 15 minutes.  You just need to cook the tortillas and melt the cheese on top.

beefenchilada
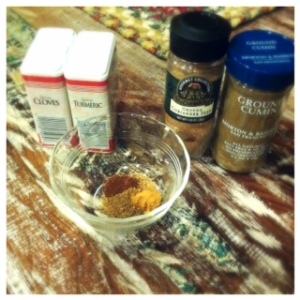
Ven a probar esta receta!  While most Spanish food is a great balance of nutrient rich tomatoes and ingredients, they can be high in calories.  However, these beef enchiladas are only 330 calories per serving.  You can lessen the carbohydrate intake by using a one semi-larger tortilla and more filling.  Try a variety of fillings and combinations to satisfy your family’s growling stomach.  With only a few ingredients and 20 minutes, you create a Spanish fiesta.


Leave a message with your favorite enchilada sauce and filling.  Follow my Pinterest for more recipes.  Check back again next Wednesday for more tips and tricks from The Cooking Bug.