Peanut Butter Fudge

Now I know you all enjoyed the Nutella fudge that we had previously tried and I promised that I’d be experimenting with different variations.  You might be wondering what could be better than Nutella and while that question may be hard to answer I can say that peanut butter comes pretty darn close.  Yup, we’re making peanut butter fudge.

Fudge can be kind of tricky and temperamental.  Weather and humidity can all effect the cooking process differently.  My Grandma is usually the one to send us peanut butter fudge around the holidays and it is something to look forward to.  Peanut butter, sugar and sweets are world-dominating combinations.  So, without further torture I’ll get down to business.

Here are some helpful tips to keep in mind:

  1. Like making any kind of fudge, have your ingredients ready to go and already measured so all you have to do is pour.  This method helps keep the steps of making fudge less messy and quicker.
  2. Melt the butter while you’re measuring because it’ll take a little bit.  If you are unsure about your speed, melt the butter on low.
  3. Make sure your stovetop mixture is at a rolling hard boil before you remove it from the heat.  You’ll notice bubbles around the edges and starting in the middle.
  4. Be sure to constantly keep mixing everything to incorporate it and make sure nothing burns.
  5. I replaced the Nutella aspect with peanut butter in a 1-to-1 ratio.  Make sure to use a thick peanut butter, no nut butters because they separate oils too easily.
  6. I used about 1/4 less powdered sugar so that it isn’t too sweet.  You can always add more powdered sugar to give the fudge form.

This fudge is creamy and delicious.  I have to say it is number 1 on the list of things I have made thus far.  It trumps any fudge that I have tried, sorry Gram, and I plan on making more in the future.  I made half of the recipe which is the perfect amount.  There is some to share without you digging in and pigging out–trust me it’s hard.

If you want to go really crazy, you can do half Nutella and half peanut butter fudge for that chocolate, peanut butter craving.  Impress your friends and co-workers with this recipe and send it out for holiday treats.  It’s quick, easy, and tasty: the best kind of sweet.

Leave a comment on your fudge ideas.  Check out my Pinterest.  Be back next Wednesday for more helpful tips from The Cooking Bug.

Spinach and Gruyere Stuffed Tilapia

spinach&gruyerestuffedtilapia

Fish Friday is weekly event my family likes to keep in mind; however, there are only so many ways to enjoy fish–or is there? Tilapia is a bland, tender cichlid fish. Thus, it works spectacular when paired with the strong flavor of Gruyere. The spinach and Gruyere stuffed tilapia works in making tilapia shine and fish Fridays a staple in all households.

Tilapia is mainly a freshwater fish, inhabiting shallow streams, ponds, rivers and lakes; the fish is less commonly found living in brackish water. Historically, tilapia was one of the three main types of fish caught in Biblical times from the Sea of Galilee. Tilapia, which is itself a latinisation of thiape, is the Tswana word for fish. They typically have laterally compressed, deep bodies. The fillets are skinless, boneless and found commonly in grocery stores. Tilapia consists of low levels of mercury and fast-growing, lean protein rich bodies. With a primary vegetarian diet, they are low in saturated fat, sodium and calories–a great addition to healthy meals.

Here are some tips to keep in mind:

  1. I suggest using Pam in place of the oil. Greasy onions gross me out, so if using oil reduce the amount. Also, the fish really does not need to be oiled before entering the oven.
  2. I used the same amount of stuffing for 4 fillets; keep that ratio in mind when re-creating this dish.
  3. Line the baking dish with foil to allow for an easy cleanup.
  4. I used extra spinach. Greens are your friends with zero calories so indulge.
  5. I used lemon juice in place of a fresh lemon because it is what I had on hand. If not using a fresh lemon, add the lemon to taste.
  6. Let the vegetables cools before adding the other ingredients. Adding the egg and cheese in too early will scramble the egg and melt the cheese creating a gooey mess.
  7. You can cut the fillets or roll them as is. They will be difficult either way.
  8. Extra filling I placed along the sides of the fillets in the pan to cook.
  9. Use a toothpick and place the fillets face down to keep them from unraveling.
  10. When finished cooking, tilapia will be opaque in color and tender to the touch.

The dish is a wonderful way to enjoy tilapia. Originally bland and boring, adding a touch of Gruyere and the health benefits of spinach–Popeye–creates an intricate dish. Pair the meal with green beans and roasted potatoes for a nutritiously balanced dinner fit for any family. Try adding other vegetables and cheese to compliment your fishy tastes. There are no wrong stuffing or flavors that tilapia won’t absorb.

Leave a comment with your favorite fishy flavors. Follow my Pinterest for more recipes. Check back again next Wednesday for more tips and tricks from The Cooking Bug.

Spring Rolls

springrolls

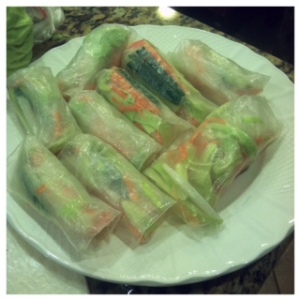
I have had spring rolls on my list for some time. I had imagined that the process was rather difficult; however, the difficulties were half the fun. By roll ten, the spring rolls begin to take proper form. The recipe causes a sticky situation with a blast of fresh flavors. From crunch to crisp, there is an abundant of reasons to try these spring rolls at the next gathering.

Daikon, mooli, or white radish is a mild-flavored, large, white East Asian radish with a wide variety of culinary uses. Despite often being associated with Japan, it was originally cultivated in continental Asia. In Japanese cuisine, many types of pickles are made with daikon, including takuan and bettarazuke. Daikon is also frequently used grated and mixed into ponzu–a soy sauce and citrus juice condiment. Simmered dishes such as oden are popular. Daikon is very low in food energy. A 100-gram serving contains only 18 Calories, but it provides 27 percent of the RDA for vitamin C.

Here are some tips to keep in mind:

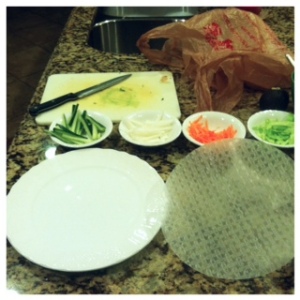
  1. Rice paper rolls can be found in the Asian department of your supermarket. Ask for help if you can’t find them; they are essential to the whole process.springrolls2
  2. The carrots, cabbage, cucumber and daikon provide a nice crunch and refreshing taste to the rolls.
  3. Tofu can be used for vegan or vegetarian rolls and chicken can be used for more protein packed rolls.
  4. I nixed the green onion just because I did not have it on hand.
  5. The mint leaves and basil would provide freshness to your palate.
  6. The peanut butter will stay clumping in the dipping sauce no matter how fast or much you whisk.
  7. I made the mistake of microwaving my peanut butter and it made the
    sauce seize.
  8. Make the sauce ahead of time allowing the flavors to combine.
  9. Use coconut aminos for a Paleo or gluten free diet.
  10. Wetting the rice paper is essential. It makes the paper flexible, but be careful because it becomes sticky.
  11. Add an equal amount of each ingredient. I suggest adding more filling than you anticipate because an equal volume of rice paper to filling makes a tasty dish.
  12. Trial and error are the staple way to make a spring roll. My first few rolls were
    rather wonky.
  13. Do not be afraid of stretching the rice paper; it will not break.
  14. Fold the spring rolls burrito style–tucking in the sides to keep the filling from falling out.
  15. These rolls need to be eaten immediately. They will be sticky so keep napkins handy.
  16. I had plenty of rice paper left over to make these spring rolls again and again. Keep them sealed and dry for use later.

Now, a taste or Asian cuisine can be enjoyed at home. These tasty spring rolls provide a new twist on appetizers for friends and family. I love the refreshing crunch and vegetable loaded bites. Enjoy the dipping sauce in full force; enjoy the crisp flavors; enjoy a spring in your step and roll.

Leave a comment with your favorite Asian dishes. Follow my Pinterest. Check back again next Wednesday for more tips and tricks from The Cooking Bug.

Teriyaki Chicken Wings

TeriyakiChickenWings

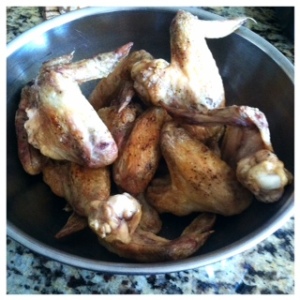
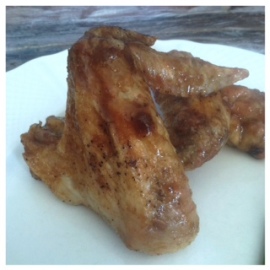
Added advantage of being on a paleo diet is that I can gorge on these delicious teriyaki chicken wings. Unlike diets with heavy carbohydrates, the paleo diet is heavy in protein and fats allowing me to enjoy in the skin and all. These wings deliver on all notes. The sauce combines sweet and salty tangs with a meaty juiciness.

Teriyaki is a cooking technique used in Japanese cuisine in which foods are broiled or grilled with a glaze of soy sauce, mirin and sugar. The word teriyaki derives from the noun teri–the shine or luster given by the sugar content in the tare–and yaki–the cooking method of grilling or broiling. Traditionally, the meat is dipped in or brushed with sauce several times during cooking. In North America, any dish made with a teriyaki-like sauce or with added ingredients such as sesame or garlic (uncommon in traditional Japanese cuisine), is described as teriyaki. Pineapple juice is usually used as it not only provides sweetness but also bromelain enzymes that help tenderize the meat.

Here are some tips to keep in mind:

  1. I used chicken wings. They combine both the drumettes and wings into one; however, using just wings or just drumettes is optional.
  2. I used coconut aminos for a paleo version. Using soy sauce will provide the same flavor, but it is not gluten free.
  3. I used honey for my sweetener. I think it is not overly sweet and works well as a thickening agent for a sauce.
  4. TeriyakiChickenWings2Careful using fresh ginger because it will cause chunks in the sauce that can be potent.
  5. Broiling works well in browning the outside skin without overcooking the meat inside.
  6. Cooking the wings skin side down for the first ten minutes, allows the meat to cook through without burning the skin.
  7. The sauce is easy! Mix all the ingredients until the desired thickness.
  8. The sauce will continue to thicken and cook after being removed from the heat, so I suggest not boiling it over seven minutes.
  9. Toss the wings evenly to coat the
    wings evenly.

Napkins will be your best friends with this meal. It is finger licking good, but on the sticky side. I could have continued to eat the entire batch myself. Keep that in mind and be sure to double or triple the meal, inviting friends and family to come and enjoy the dish. It is a quick and easy meal for reunions and parties. Have everyone over to enjoy some wings and wow them with the sweet and salty crunch of these meaty wings.

Leave a comment with your favorite wing sauce. Follow my Pinterest. Check back again next Wednesday for more tips and tricks from The Cooking Bug.

Bread Caveman Style (Paleo)

paleobread2

I love bread; so, entering a paleo diet was rather difficult. Taking the transition slowly, I decided to experiment with this paleo bread. Understanding that this bread is made with coconut and mainly almond flour is key. These flours act differently than your typical white and whole-wheat flours.

paleobread

Almond flour, almond meal or ground almond is made from ground sweet almonds. Almond flour is usually made with blanched almonds (no skin), whereas almond meal can be made both with whole or blanched almonds. The consistency is more like corn meal than wheat flour. Almond meal has recently become important in baking items for those on low carbohydrate diets: the paleo diet. It adds moistness and a rich nutty taste to baked goods. Items baked with almond meal tend to be calorie-dense. Almond meal has low heat conductivity. Almonds have high levels of polyunsaturated fats in them. Typically, theomega-6 in almonds is protected from oxidation by its surface and vitamin E. When almonds are ground, this protective skin is broken and exposed surface area increases dramatically, greatly enhancing the nut’s tendency
to oxidize.

Here are some tips to keep in mind:

  1. I used a mixed berry flax seeds. It added a few extra sweet notes because of the fruit.
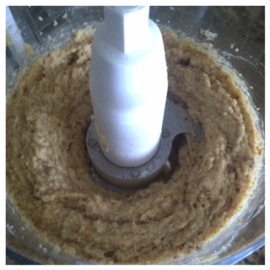
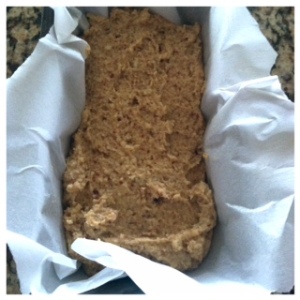
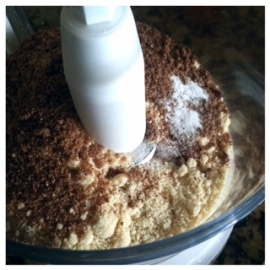
  2. Processing the dry ingredients in a food processor mixes them together and helps break apart the flax seeds.
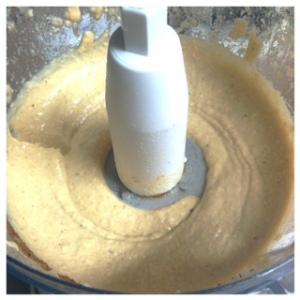
  3. I added my wet ingredients straight into the food processor­–being sure to really mix
    the ingredients.
  4. Blending the dry ingredients separate is the proper technique because it allows for an even mix.paleobread3
  5. I lined my loaf pan with parchment paper: it keeps the pan clean and permits
    easy removal.
  6. I love using honey as a sweetener. It is a great adhesive because it is sticky, and it is not overly sweet.
  7. I allowed my bread to cool on a cooling rack. It will continue to cook if left in the pan; however, I don’t mind a semi-doughy center.
  8. The bread will note rise because it lacks active yeast, so do not base your cooking times on that staple.

Used in moderation, the bread provides some comfort food in the transition to a strict paleo diet. Although it is harder to make sandwiches because of it’s lack in height, it pairs well with nut spreads and homemade, sugar free jams. I love the light density the bread creates; I love the nuttiness from the almond flour; I love that I can enjoy bread–for now.

Leave a comment with your favorite jams and nut spreads. Follow my Pinterest. Check back again next Wednesday for more tips and tricks from The Cooking Bug.

Roti–Indian Flatbread

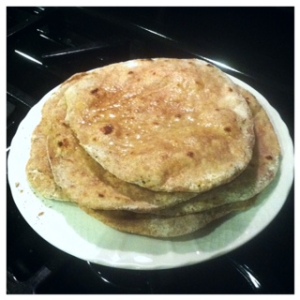
I love bread! It is a horrible and honest answer, but since I was a child I have enjoyed bread of any kind. I was excited to have found a recipe for what I had thought was naan. However, I was surprisingly excited to understand the differences between naan and what I found to have made, roti. The following describes the subtle differences:

Naan or Nan is a leavened, oven-baked flatbread. It is popular in West, Central and South Asia. In Iran, from which the word ultimately originated, nān does not carry any special significance, as it is merely the everyday word for any kind of bread. Naan in other parts of South Asia usually refers to a specific kind of thick flatbread. Generally, it resembles pita and, like pita bread, is usually leavened with yeast or with bread starter. Naan is cooked in a tandoor, from which tandoori cooking takes its name. This distinguishes it from roti, which is usually cooked on a flat or slightly concave iron griddle called a tava. Typically, it will be served hot and brushed with ghee or butter. It can be used to scoop other foods, or served stuffed with
a filling.

roitindianflatbread

Roti is generally an Indian bread, made from stoneground wholemeal flour, traditionally known as atta flour, that originated and is consumed in India, Pakistan, Nepal, Sri Lanka and Bangladesh. It is also consumed in parts of South Africa, the southern Caribbean–particularly in Trinidad and Tobago–Guyana and Fiji. Its defining characteristic is that it is unleavened. Indian naan bread, by contrast, is a yeast-leavened bread. Roti and its thinner variant, known as chapati, are integral to Indian and Pakistani cuisine

Here are a few tips to keep in mind:

  1. I used whole-wheat flour.
  2. I used more than the amount of water suggested.
  3. You want to create dough that is firm but a cohesive piece.
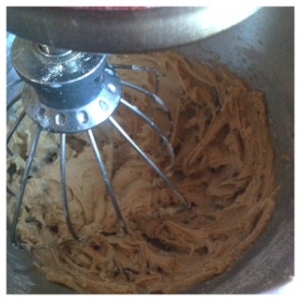
  4. I mixed the dough in my Kitchen Aide mixer, then I kneaded it to incorporate the missed flour and lost pieces.
  5. I was able to divide my dough into nine balls, probably 12 had I made them evenly sized.
  6. Be sure to roll them thinly. Thicker pieces will leave a doughy texture when cooked.
  7. After rolling them, place them on a cookie sheet layering them with paper towels to keep them from sticking.
  8. Be sure to not over flour them because the flour residue will stick to the naan during the cooking process and be left afterwards. No one likes raw flour.
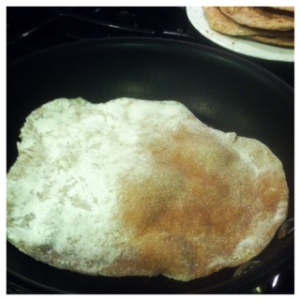
  9. Heat the skillet, without oil or Pam, on high.rotiindianflatbread2
  10. The dough will begin to bubble with air pockets within 30 seconds. Flip the bread immediately to reduce the chance of burning the bread and cook for an additional 30 seconds.
  11. The tops of the naan will be freckled with brown cook spots.
  12. Oil only the top of the naan. Because the bread is thin, the oil will be absorbed on both sides.

Understanding my love for Indian dishes, I am thrilled to understand both the difference between naan and roti and having found a recipe that allow for a traditional bread to accompany my future exotic dishes. Paired with a curried quinoa stew or as a side to a tikka masala, the roti is simple and easy to make. You can even add peanut butter and enjoy as is, like my mother. Hurry though because with friends and family there might not be any left
for you.

Leave a comment with your favorite Indian recipes. Follow my Pinterest for more recipes. Check back again next Wednesday for more tips and tricks from The Cooking Bug.

Cookie Dough Truffles

cookiedoughtruffles2

Cookie dough ice cream, cookie dough milk shakes and now cookie dough truffles!  I, like most people, always wanted to lick the spoon after making cookies with my mom.  However, before sneaking a bite or two my mom would berate me for eating raw eggs.  The solution?  Eggless cookie dough!  Not only does the recipe curve my sweet tooth, but I took it one step further by making the cookie dough into truffles.

cookiedoughtrufflesThe “American truffle” is a half-egg shaped chocolate-coated truffle, a mixture of dark or milk chocolates with butterfat and, in some cases, hardened coconut oil.  The “European truffle” is made with syrup and a base made up of cocoa powder, milk powder, fats, and other such ingredients to create an oil-in-water type emulsion.  The “French truffle” is made with fresh cream and chocolate and then rolled into cocoa or nut powder.  The “Belgian truffle” or praline is made with dark or milk chocolate filled with ganache, buttercream or nut pastes.  The “Swiss truffle” is made by combining melted chocolate into a boiling mixture of dairy cream and butter, which is poured into molds to set before sprinkling with cocoa powder.  As you can see there are many ways to make a truffle, but this recipe simplifies and hits the nail on the head: a win-win.
Here are some tips to keep in mind:

  1. I halved the cookie dough recipe.
  2. I think the recipe was too sweet, so I suggest adding more flour as a thickener and less brown sugar.
  3. Make sure your butter is softened allowing it to incorporate evenly.
  4. Add any type of filling–chocolate chips, M&Ms or any other candy.
  5. Make the truffles using a melon baller or similar instrument.
  6. Place your truffles on wax paper in the freezer until they harden.  You can put them in the fridge, but they take longer to harden.
  7. I used semi-sweet chocolate as the coating.  I suggest dark chocolate to cut the sweetness.  You can use any type of your choosing.
  8. Place the truffles back in the fridge or freezer to harden after coated in chocolate.

Cookies are extremely versatile.  These truffles are no different.  You can mix and match add-ins; you can mix and match the chocolate coating.  These sweet treats are pop-able and delicious.  Without getting sick, you can enjoy your favorite dough without hesitation.  For up to three months, the cookie dough can be stored and enjoyed–unless you, like me, cannot keep your paws off it.

Leave a comment with your favorite cookie add-ins.  Follow my Pinterest for more recipes.  Check back again next Wednesday for more tips and tricks from The Cooking Bug.

Garam Masala Hummus

garammasalahummus

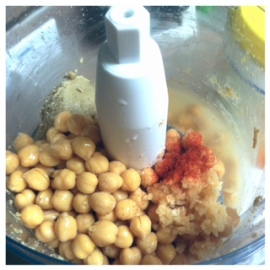
Hummus is a great side dip for parties and gatherings; however, store bought hummus can be expensive for the amount you receive. Eating out at Indian restaurants can be expensive as well. Solution? Homemade Hummus–it’s inexpensive and extremely versatile. From garlic to roasted bell pepper, hummus can be appreciated by all taste buds. The garam masala hummus today brings a big bite of the Mediterranean home.

Garam Masala is a popular Indian spice consisting mostly of black and white peppercorn; cloves; black and white cumin seeds; cinnamon and black, brown and green cardamom pods. Some masala may be toasted before use to extract flavor and aroma. Garam refers to the intensity of spices, which one can sense from just a whiff. Surprisingly, there is no single garam masala. Recipes and ingredients differ according to region as well as a chef’s individual preferences. From turmeric to fennel seeds, variations can arise to accompany the dish’s flavor; consequently, most pre-made spice mixes in grocery stores contain the basic ingredients.

Here are some tips to keep in mind:

  1. I used homemade tahini, but you can use store bought. Most kinds of tahini are found in the healthy, ethnic or refrigerated sections of your supermarket.
  2. I used bottled lemon juice. If you use fresh, be sure to squeeze the lemon over a mesh colander to keep the seeds and strings from falling into your hummus.
  3. You may want to use more olive oil depending on the consistency of the hummus.
  4. Feel free to add more than a pinch of paprika to balance out the garam masala. I
    love paprika.
  5. Use about ¾ tsp of garam masala and add more to your tasting. It can be a potent spice if you are unfamiliar with the flavors.

garammasalahummus2Again, hummus makes the perfect party platter or side at lunch.  Pair hummus with chips and crackers or add to a wrap for an extra umph.  There are several variations of hummus to keep your stomach happy. Experiment to find your favorite recipes after trying the garam
masala hummus.

Leave a comment with your favorite hummus dip recipes. Follow my Pinterest for more recipes. Check back again next Wednesday for more tips and tricks from the Cooking Bug.

Zoodles

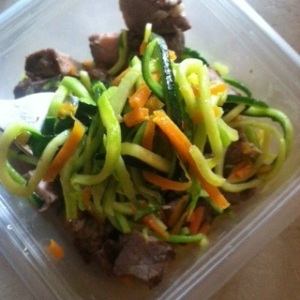
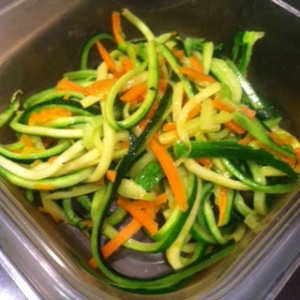
Zoodles2Is it a poodle? Is it a noodle? It’s zucchini noodles!!!!! Or as many like to call them the famous zoodles—perfect for low carb or Paleolithic diets. These surprisingly tasty substitutes for noodles are quicker to cook and full of beneficial nutritional treats. From boring and bland to pizzazz and pop, zoodles add both flavor and color to any dish.

Zucchini provides only 17 calories per 100 g. It contains no saturated fats or cholesterol. The peel is good source of dietary fiber that helps reduce constipation and offers some protection against colon cancers. Zucchinis can be available all around the year, but they are at their best during late spring and summer seasons. In the stores, choose small to medium-sized zucchini featuring shiny, bright green skin, firm and heavy in hand. The best size for zucchini is 6 to 8 inches length and 2 inches or less in diameter. Some big sized varieties with marrow are specially grown for stuffing. Minor superficial scratches and mild bruises oftentimes seen on their surface are perfectly fine. Avoid overly mature, large zucchini with pitted skin, and those with flabby or spongy textured. Furthermore, avoid those with soft and wrinkled ends as they indicate old stock.

Zoodles3

Here are some helpful tips to keep in mind:

  1. For this recipe, use fresher zucchini. Zucchini that has been sitting around becomes too watery and is hard to spiral/peel.
  2. You can use different tools to create zoodles: a sprialer or a ribbed peeler. I used a ribbed peeler.
  3. You can peel the skin off the zucchini, but my preference is to keep it on. It creates a nice contrasting light and dark green of color to the dish.
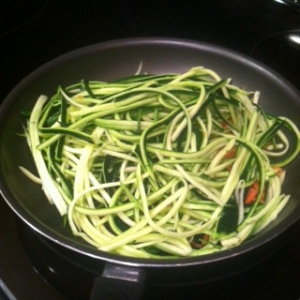
  4. Sauté the zucchini in a heated pan of olive oil or coconut oil. Start out with less oil than you think you’ll need because you can always add more in.
  5. Toss the zucchini a couple of times while cooking to keep it from burning and cooking through evenly.

ZoodlesZoodles trending popularity comes with the new wave of low carb dietary restrictions and healthier substitutions. Unlike heavy pastas, zoodles offer a low calorie, zero carb vegetable to your plate. Cooked properly, the zucchini turns a vibrant green that makes my heart melt and my mouth water. I love using fresh zucchini from the farmers market because the zucchini tends to be in better form. Whatever your reason, zoodles are a great way to enjoy vegetables and mix up your diet.
Leave a comment with your favorite zoodle addition: meat, sauce, pesto or more the options are endless. Follow my Pinterest for more recipes to try. Check back again next Wednesday for more tips and tricks from The Cooking Bug.

Honey-Chipolte Meatballs

honeychipoltemeatballs2

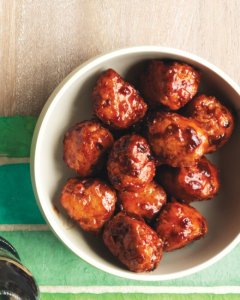
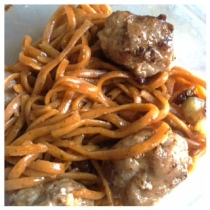
Sweet and spicy with a tangy punch, these honey-chipolte meatballs are a flavor blaster to any dish.  They will ramp up pasta or sandwich.  Within ten minutes, you’ll have a delicious dish that shine.  Turkey is a great substitute to ground beef with less calories and saturated fats; turkey is even juicier than chicken, so the meatballs won’t dry out.

Here are some tips to keep in mind:

  1. I used turkey sausage instead of ground turkey.  Remove the turkey from the casing and it acts just like paged ground turkey.
  2. I added purple peppers to the mix along with onion for an extra crunch.
  3. Instead of cider vinegar, I used red wine vinegar.  You just need the acidity to balance the sweetness of the honey and spiciness of the chilies.
  4. Be sure to brown the meatballs in a pan before placing them in the oven to prevent them from drying out.
  5. Placing them in the oven allows the turkey to cook through without burning the outside.
  6. Be sure not to burn the sauce by constantly stirring the mix of meatballs in the sauce.  Tip the pan to allow the sauce to gather in one spot.  Then, spoon it evenly onto all
    the meatballs.
  7. I used about 2 sausages and made 8 meatballs, about 4 meatballs per sausage.

honeychipoltemeatballs

These sweet and spicy meatballs will make your mouth sizzle.  They pair well with pasta or as a hoagie with peppers and onion.  It’s a new way to enjoy turkey with flavor that will blow your taste buds away.  Try it the next time you want to spice up your bland pasta.

Leave a comment with how you enjoy ground turkey.  Follow other recipes and dishes on my Pinterest.  Be sure to check back next Wednesday for more tips and tricks from The Cooking Bug.